
What took me so long?
It is ridiculous to think that I have been making videos for nearly twenty years now, and I have only just figured out how to create technically sound video. Our family had a good old fashioned tape camera, but I wasn’t too much into photography in my teens. It was around the year 2000 when I got a camcorder that took mini dvd’s. This was a fast-track way of getting digital footage onto a computer and editing it. It had a USB port and I could download all of the footage onto the computer and wipe the disc, ready to create another rubbish home movie.

Where it all started
The years of cliche edits and mediocrity
Of course I upgraded that camcorder to a version that shot in HD, and had a built-in hard drive, so that I could store 80 hours of footage on the camera - who is saving 80 hours of footage on a camera! These were the stale years of my video creation, although my holidays, skydives, racing day experiences were all documented; there was no story telling, no creativity and I had no role models to emulate.
More gear…still no idea

Image courtesy of DP Review
In 2003 I purchased Canon’s first DSLR, the 300D. The gap in quality between my photos and my video changed dramatically in this period. I had a 50mm f1.8 on my Canon, and I was destroying backgrounds left, right and centre. The camcorder still had everything beautifully crisp and in focus…everything was in focus. The editing of my videos continued to get better, but the creativity of the videos was going nowhere. I used to use some of the worst transitions, cheesy soundtracks and my travel videos literally used to start at the location. No consideration for telling the story about the journey or the build up.
Fast forward..

Canon 550D with video functionality
And this is a big leap, to 2011. My wife buys me a Canon 550D as an engagement gift, and this has a video mode on it. Finally, I had some control over focus, blurring backgrounds and I was able to film in low light conditions. This was good, because my first daughter was born in 2012, and this marks the point that I felt obliged to document her life. It is obsessive to make a video about every important event, but the trick to it is to edit those videos - otherwise you will never share them, an no one wants to sit through hours of footage without some tight editing. Plus I am always showing my family a video from say last Christmas, and they have forgotten everything that happened. It is time consuming but very rewarding.
What happened next?

Some film-making inspiration
YouTube, that is what happened. I started to watch tutorials on landscape photography, but then I got sucked into watching Casey Neistat’s vlogs - and his ability to create a videos about the most mundane topic, yet he made it interesting. I was intrigued. I asked myself the question, rather than just getting up at sunrise and shooting landscape photos, could I show people my journey and just how much work goes into creating that one image that I post online? This was my new challenge.
Getting my technique right
I thought my videos were good at that point, but I was very wrong. I approached video creation in the same way that I approach most things. I read the manual, watched tutorials, found a way of making the camera work for me, and not be an excuse for the inadequate outcome. At this point I was just switching my DSLR from stills to video and hitting record. To the untrained eye, this looked fine, but looking back at the footage now, it looks awful. Let’s break it down into components so that you don’t make the same mistakes as I did.

I was using all the wrong settings for my videos…
Frame rates
You may have heard the terms NTSC and PAL before? Quite simply this relates to the video frame rate in different parts of the world. In Europe we use PAL, which is 25 frames per second (FPS). 24fps was popularised by movies and film projection - and this number is crucial because when the human eye sees 24 still images flickering in front of it per second, it can no longer differentiate them as stills. Very much in the same way that cartoons are made. TV historically used to be 50i (EU) and 60i (the US) (the i stands for interlaced, whereas p stands for progressive scan). There is a very good reason why frame rates are different in the UK and US, and this is to do with the frequency of artificial lighting. In the UK, lights have a frequency of 50hz, which means that they pulse 50 times per second. If you shoot video with teh same frequency then you don’t get any flicker. If you shoot UK settings in America where their lights are flickering at 60 times a second, your camera will pick this up. If you upload a video to youtube at 24,25 or 30fps, then it will make no difference in the end, providing that all of the footage is captured at the same frame rate. If you shoot one clip on a DSLR at 25fps and some footage on an iphone at 30fps, the iphone section will look jittery because the editing software will throw away five frames every section to make it ‘fit’ the DSLR footage (this is based upon you telling the editing software that you want your overall video timeline to be at 25fps).

The first thing to do is to pick the right settings for your region.
Slow motion & timelapse
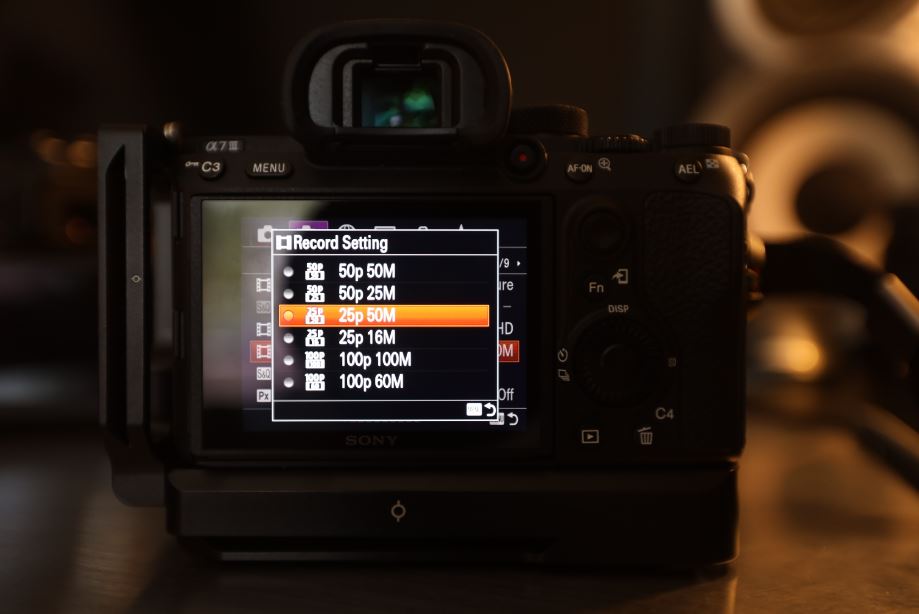
The Sony A7iii lets you shoot up to 100fps
Speeding up footage is easily done in editing software afterwards, and if you create a timelapse in camera then it will create a video file at 25fps. If you speed up your footage in software later I tend to keep it in increments of 2 (as in double or four times the speed), so that it can lose every other frame - to keep the footage smooth. Slow motion on the other hand requires some forward thinking. If you know that you intend on slowing down your footage later, then you can shoot at a higher frame rate, such as 50fps or 100fps - and once you put that on a 25fps timeline it will be half or quarter speed. Most cameras have restrictions when it comes to 100fps though, such as limited focusing capabilities or no audio recording. You will also have to increase your shutter speed to accommodate a higher frame rate, more on this below.

Timelapses allow you to see time passing by for a different perspective
Resolution
4K, 6K, 8K…where will it end? The camera companies seem to just keep increasing the possible resolution, but I still only shoot in full HD. I can shoot in 4K, but I don’t feel the need to do so. There is benefit to shooting in 4K, for example you can crop in 2x without moving your camera or lens in editing afterwards, but you will need a more powerful computer to handle the 4K files. It also takes up more space on your memory cards, hard drives and your camera will heat up much faster! In case you are you are not up to speed, full HD is 1920x1080 pixels, which you might often hear as 1080p. If you do the maths on this, it is around 2 megapixels, which is not very much when you compare it to photo resolution. But if the sensor on your camera is say 24 megapixels, how does it create a 2 megapixel image that is the same size? Well, some cameras crop in to where the sensor is actually the video resolution that you are after, others interpolate the footage - which simply means that they throw away some of the pixels. Ideally you want to be looking for a camera that shoots in full HD and 4K using the entire sensor, because when you crop in to shoot 4K for example you have to step back to have the same composition. Using the full sensor is something that Sony offers, but Canon has a significant crop.

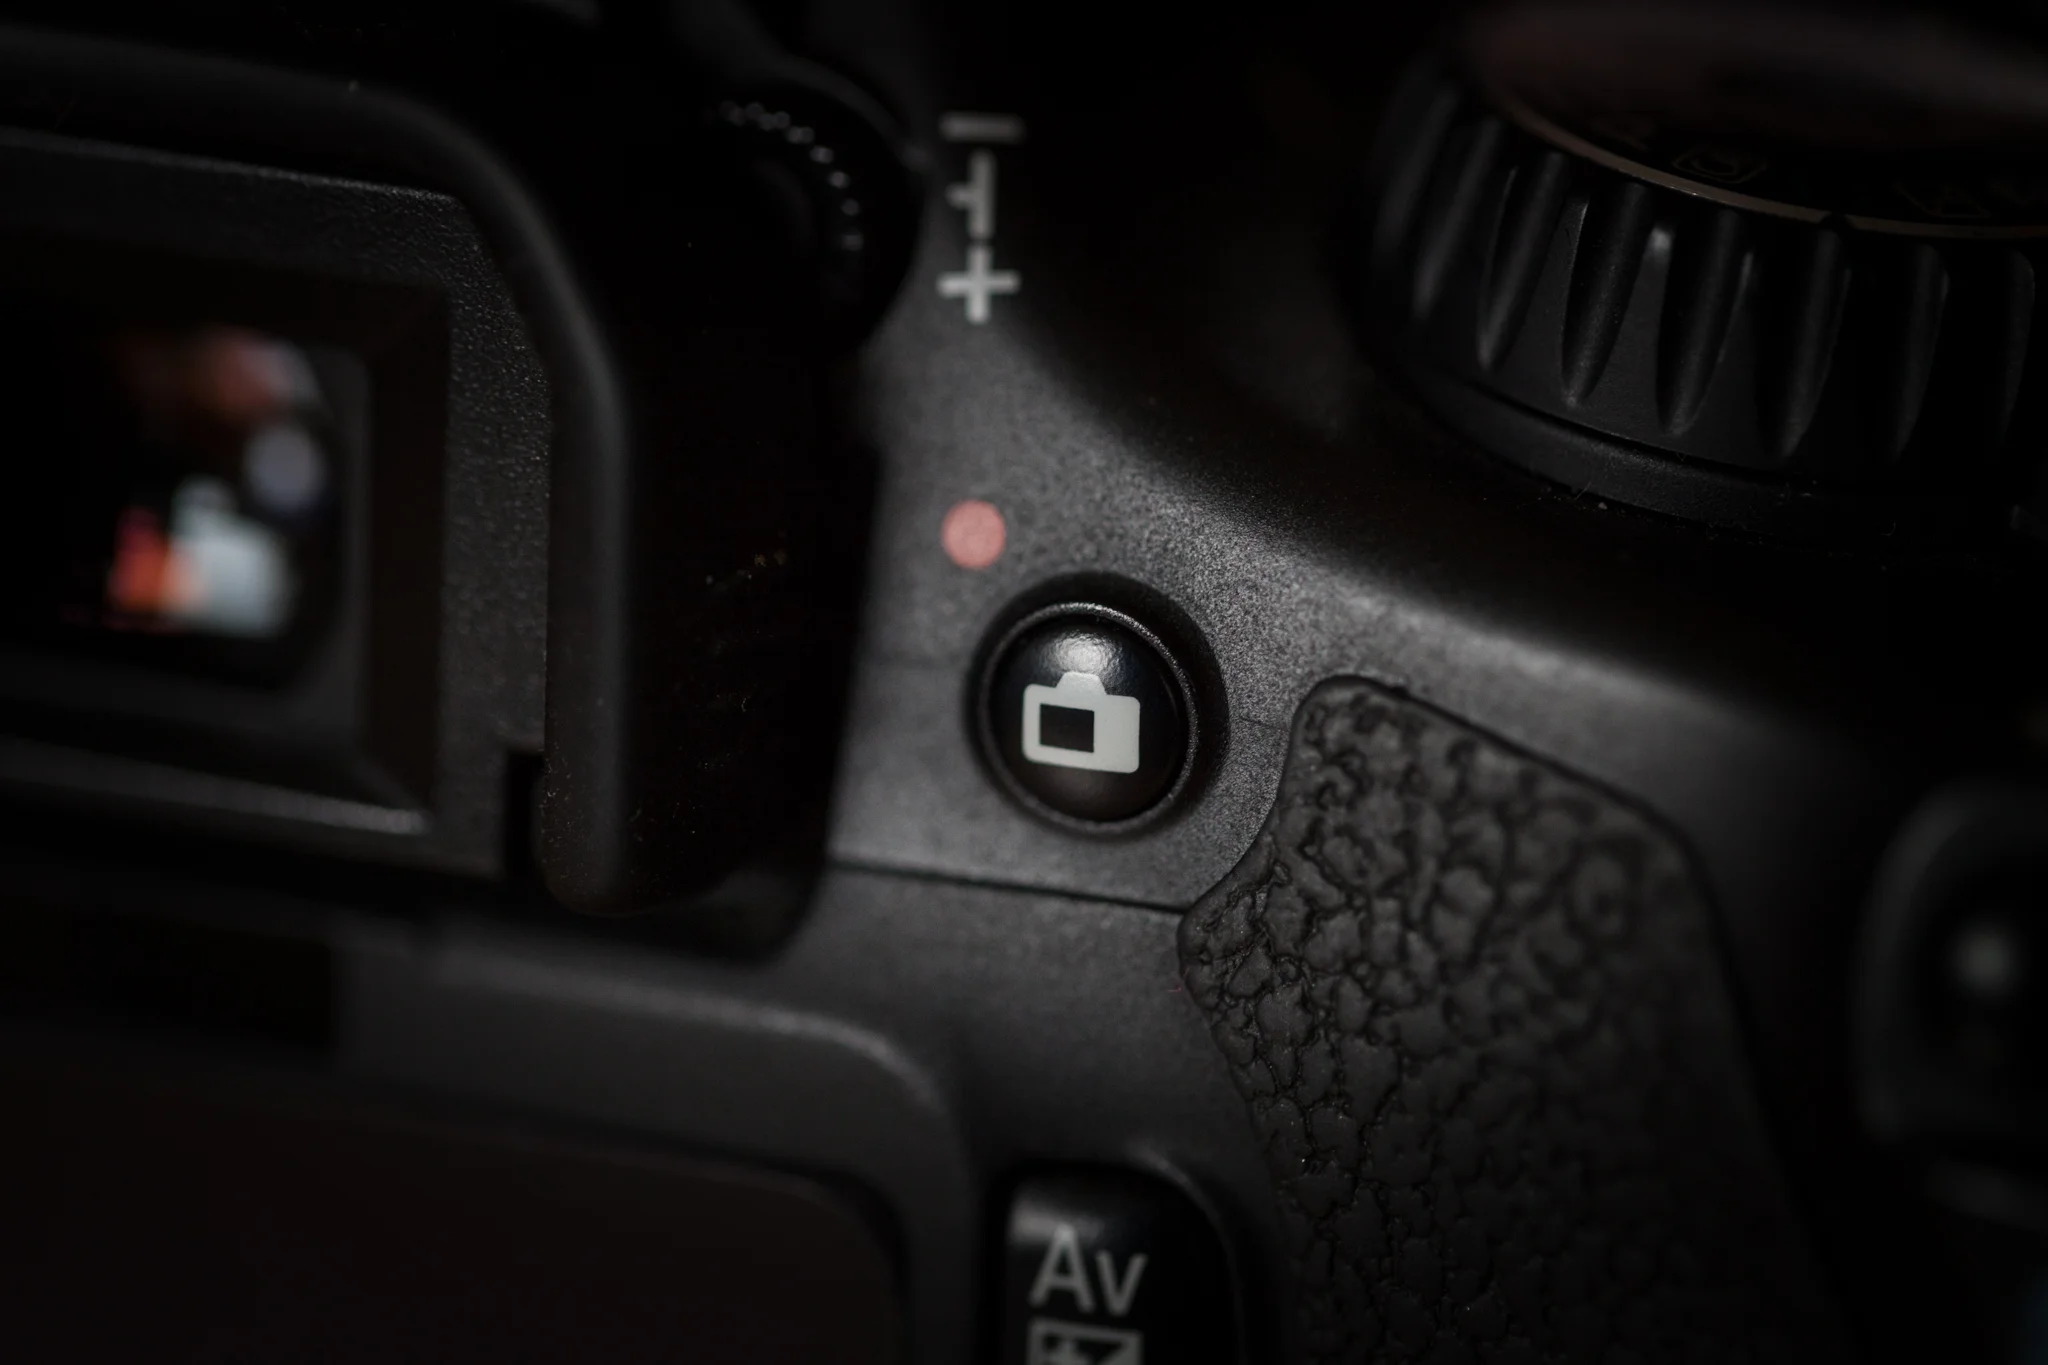
The video options on the Canon Eos R
Shutter speed
This is one of the most important learning curves when it comes to video, as there are some strict rules. Unlike photography, where you use shutter speed for creative control, you no longer have a choice of which shutter speed you use. Well, you do, but the footage will look amateur. When I first started shooting video on my Canon 550D, I used to whack on my nifty fifty and shoot wide open at f1.8. This inevitably results in a fast shutter speed, and if you watch moving objects at high shutter speeds it looks like an action movie. Fast shutter speeds are a creative decision, typically used for action scenes. For natural movement, similar to what the human eye sees (you know the blur that you get if you wave your hand in front of your face), you need to use a shutter speed twice that of your frame rate. Therefore excluding slow motion, I have to maintain a shutter speed of 1/50th second. This is called the 180 rule, don’t ask me why, but I do know that it works and to up your video game you should stick to it.

The correct settings for creating technically sound video
Custom settings on your camera
To make things as easy as possible for myself, I have created settings specifically for video on my Canon and Sony cameras. I just click the dial to Custom 1 and it sets the shutter speed to 1/50th and the aperture to f5.6 (this allows for variable aperture zoom lenses) and auto ISO. If I am shooting outdoors I will always have a variable ND filter attached, so that I can maintain a shutter speed of 1/50th regardless of the lighting conditions. I use custom 2 for slow motion, and no matter how I change the settings whilst using it - once you change the mode or switch the camera on/off, it will go back to your custom settings.

Utilise the custom features to make creating video easier
aperture and iso
These are exactly the same as in stills photography, use them for creative control and to maintain your shutter speed. In my opinion you can get away with a lot more noise in video than you can in still, because it is constantly moving and you cannot zoom in on the image. I am therefore happy to shoot at high ISO’s on my Canon and Sony cameras.

autofocus and flip screens
It was at the beginning of 2017 that I finally realised that I wanted to start making some serious youtube videos, and for this I was going to need a camera that had autofocus in video mode. Some of you will be surprised to hear that this doesn’t exist on a high end camera like the 5D mk3, but it is simply missing from its features. You sit in front of the camera, hit record and the focusing just goes to sleep! After a bit of research, and on the basis that I was going to stay in the Canon eco-system, I decided on the Canon 80D.

The autofocus and fully articulating screen makes this the perfect camera for making video
It has cropped sensor, but has one of the best autofocus systems around, and it has a screen that hinges out; so that you can see yourself. This has completely transformed the way that I make videos, both for youtube and family videos. I am actually in my home movies a lot more now - rather than just being a voice from behind the lens. Find the right camera that works for you, but you will need to have a microphone input (a headphone jack is also nice for monitoring audio), and if the screen flips upwards does the microphone on top of the camera get in the way.

The limiting screen on the Sony cameras makes it difficult to film yourself, as it only tilts upwards
Best lenses for video
As I covered above, the resolution of video is much lower than a photograph, and you can therefore get away with having lower quality lenses. Obviously use really good glass if you have it, however you will quickly find that lenses designed for stills are not always great for video. Most high end lenses have a lot of glass in them, and the focus system has to work hard to move all of those elements around - which will be picked up on the microphone. Canon have produced a line of lenses called STM, which has very very quiet focusing. Some of them have built in stabilisation and most of the are relatively cheap and lightweight. They do however start to fall down in low-light conditions. In that situation I would opt for a faster lens and manual focus or certain lenses have quiet enough focusing with the right shotgun microphone. Some of Sony’s lenses are also very quiet when it comes to focusing - you just have to try them out or watch reviews on them.

Canon STM lenses have silent focusing - perfect for video
Before we leave stabilisation, no one likes shaky footage. There is a limit to how much shaky footage you can have before people will switch off or throw up. When making a video I always try to mix up shots that are on a tripod/surface and walking/moving shots. Wide angle lenses are more forgiving for camera movements, throw in stabilisation on that lens (Canon 10-18mm is great for vlogging) and you have a great setup.
Don’t neglect audio

External shotgun microphone - made by Rode
‘They say’ that it is easier to watch a shoddy video with good audio rather than a good video with bad audio. The built in mic on your camera is a last resort. You need to be recording your audio using an external mic or to an external device. I use a selection of Rode microphones, they range from small mics that you can plug into your iphone, to shotgun mic’s that sit on the hotshoe on top of your camera. Recording your audio separately is the professional way of doing things, but you have to synchronise the audio and video in editing afterwards, which will slow down your workflow. You have options, anyway. I recently got my hand on the Rode Go, which is a very small wireless microphone system that you clip onto your subject, and they can be a whopping 70m from the camera and record perfect audio!

Image courtesy of Rode
Music
Whilst on the topic of sounds, music is critical to creating a mood/atmosphere, and controlling the energy levels throughout the video. If you intend on overlaying photos to your video, or creating some B-roll, practice cutting the imagery to the rhythm of the music - it will help to make the video cohesive. There are some music subscriptions services, such as Epidemic Sound, which are a great way of getting music on YouTube without running into copyright issues.

Youtube’s music policies
Lighting
Lighting for video is exactly the same as it is for stills. You still need to light your subject in a flattering way, but with video you will need constant lights. Because it is 2019 most lights are also day-light balanced, but unlike shooting still where you can fix the white balance of a raw file in Lightroom afterwards, if your video was filmed on auto white balance and it changes throughout the video clip - you have a challenge on your hands trying to fix it. In this instance I would recommend using a fixed white balance, which will be easier to adjust when editing.

Daylight balanced LED panels - ideal for video or product photography
The next level of production
Stabilised footage is one thing, but super smooth footage, drone footage and hyperlapses will make people stop and watch your videos. You can spend very little achieving these results, or you can spend a lot! Creating smooth footage whilst on the go used to be very difficult, but there are cost effective solutions. I picked up a DJI Osmo mobile for £75, and this creates very smooth footage straight onto the iphone. DJI Osmo, was my first stabilised gimble, and the footage simply looks like you are floating through the scene - it is magical. But the footage from a phone sticks out when you put it in the same video as a full frame camera, so if you budget stretches to it I would recommend getting a gimble that will hold your camera. Most mirrorless cameras are small enough for a gimble to take with a reasonable size/weight lens. I use the Zhiyun Crane, and I have no complaints.

Gimble for DSLR’s and mirrorless cameras
For shooting interiors of buildings I use a slider, which is quite simply a rail that you fix your camera to and it uses belts and weights to create smooth movement. The mechanised add-ons are pretty expensive, but you have a lot more control over these and they can be programmed to repeat the same movement over and over. An easy hack to create movement is to film something in 4K and pan or zoom in editing software later, when outputting to full HD that is.
And finally editing…
All of the above is pointless if you don’t edit your videos. No one gets video right in camera, there is always an element of editing, even if it involves adding some text, a voiceover or some complicated masking transitions. If you learn how to edit videos well, the production value of your content will be considerably higher. I use Adobe premiere, because it is part of the creative cloud suite, and I am very familiar with adobe software. I am sure that others are similar, I used to use Corel Video Studio Pro, but there were certain features such as colour correction and exposure control that were too limited for what I needed.
There you go…
So, if you are a competent photographer and you were thinking of giving video a try for your next client, try out some of the above tips and tricks in your free time and you could be making sweet videos in no time!
Thanks for reading.
Ben
Thanks for reading.
Ben
