
Portraits - flash vs ambient
To flash or not to flash
There are two types of photographer when it comes to flash. Those that know how to use it, and those that are very afraid. I used to be scared of flash, so I booked myself on an off-camera flash course with Adam Bronkhorst, and I am very happy that I did. Once you know, it seems simple, but there are a few things that you need to get right for successful result. Some full-time photographers say that they only shoot natural light, but the truth is that they don’t know how to use flash. If you use natural light only then you are limited by what the elements give you, and of course if you are shooting a wedding in a dim church, you cannot rely upon an epic shaft of light to fall on your bride and groom at the right moment. The fact is, if you know how to use flash, you now have the choice to use flash when you need it, or use natural light when you want to. You can take photographs 24 hours a day!
My experience with shooting portraits
I took all of the portraits off my website some time ago, as too many people were asking me to photograph their wedding. But I have taken a lot of portraits over the years. Here are a few examples of my eldest.
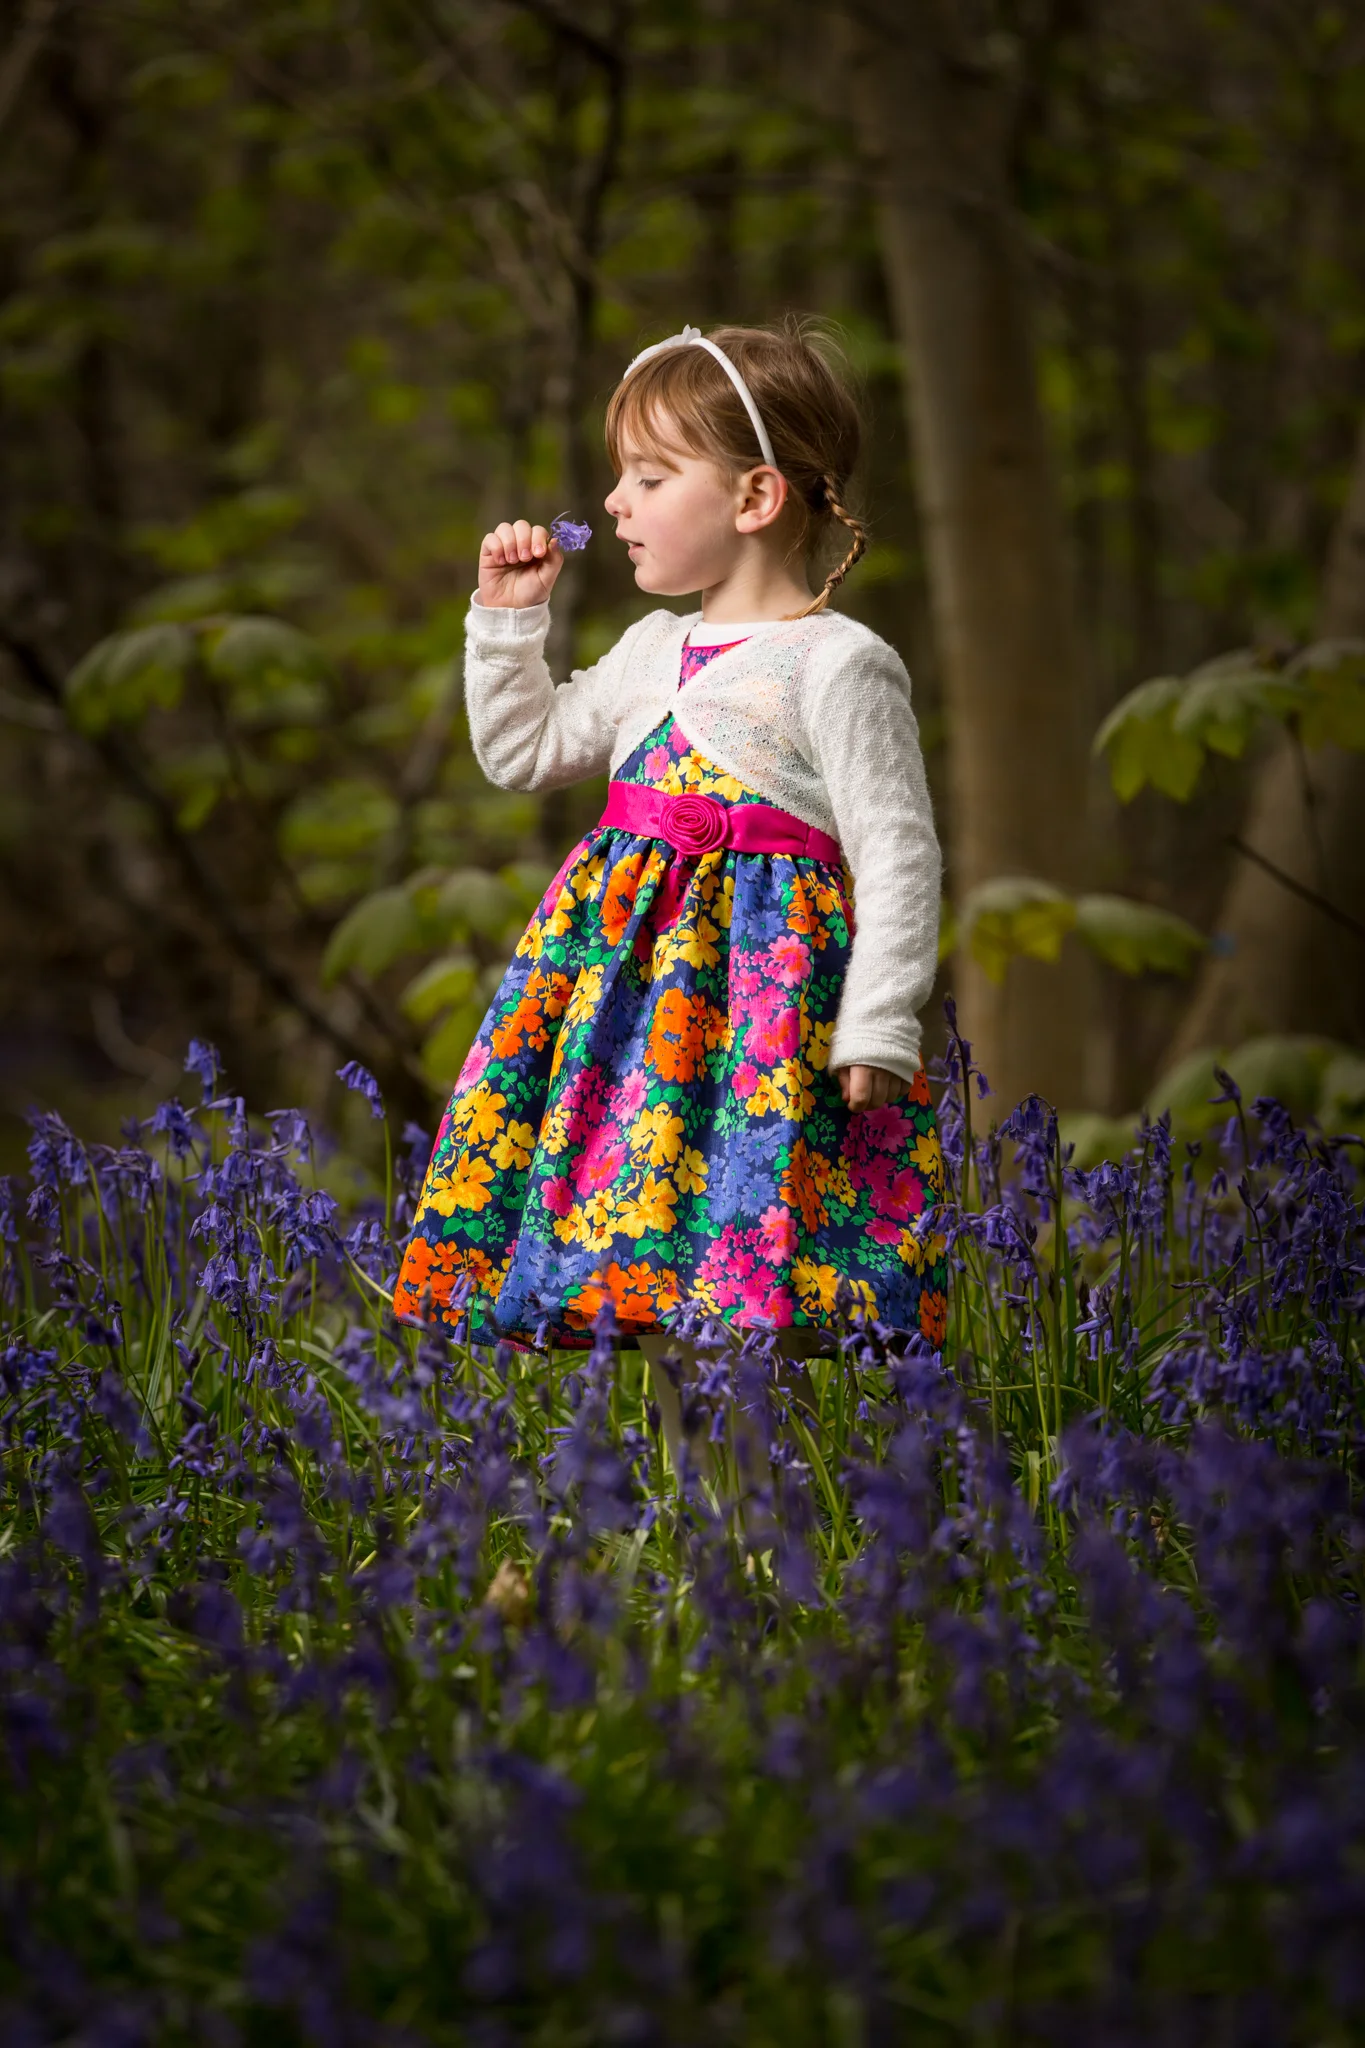
Off camera flash portrait in bluebell woods
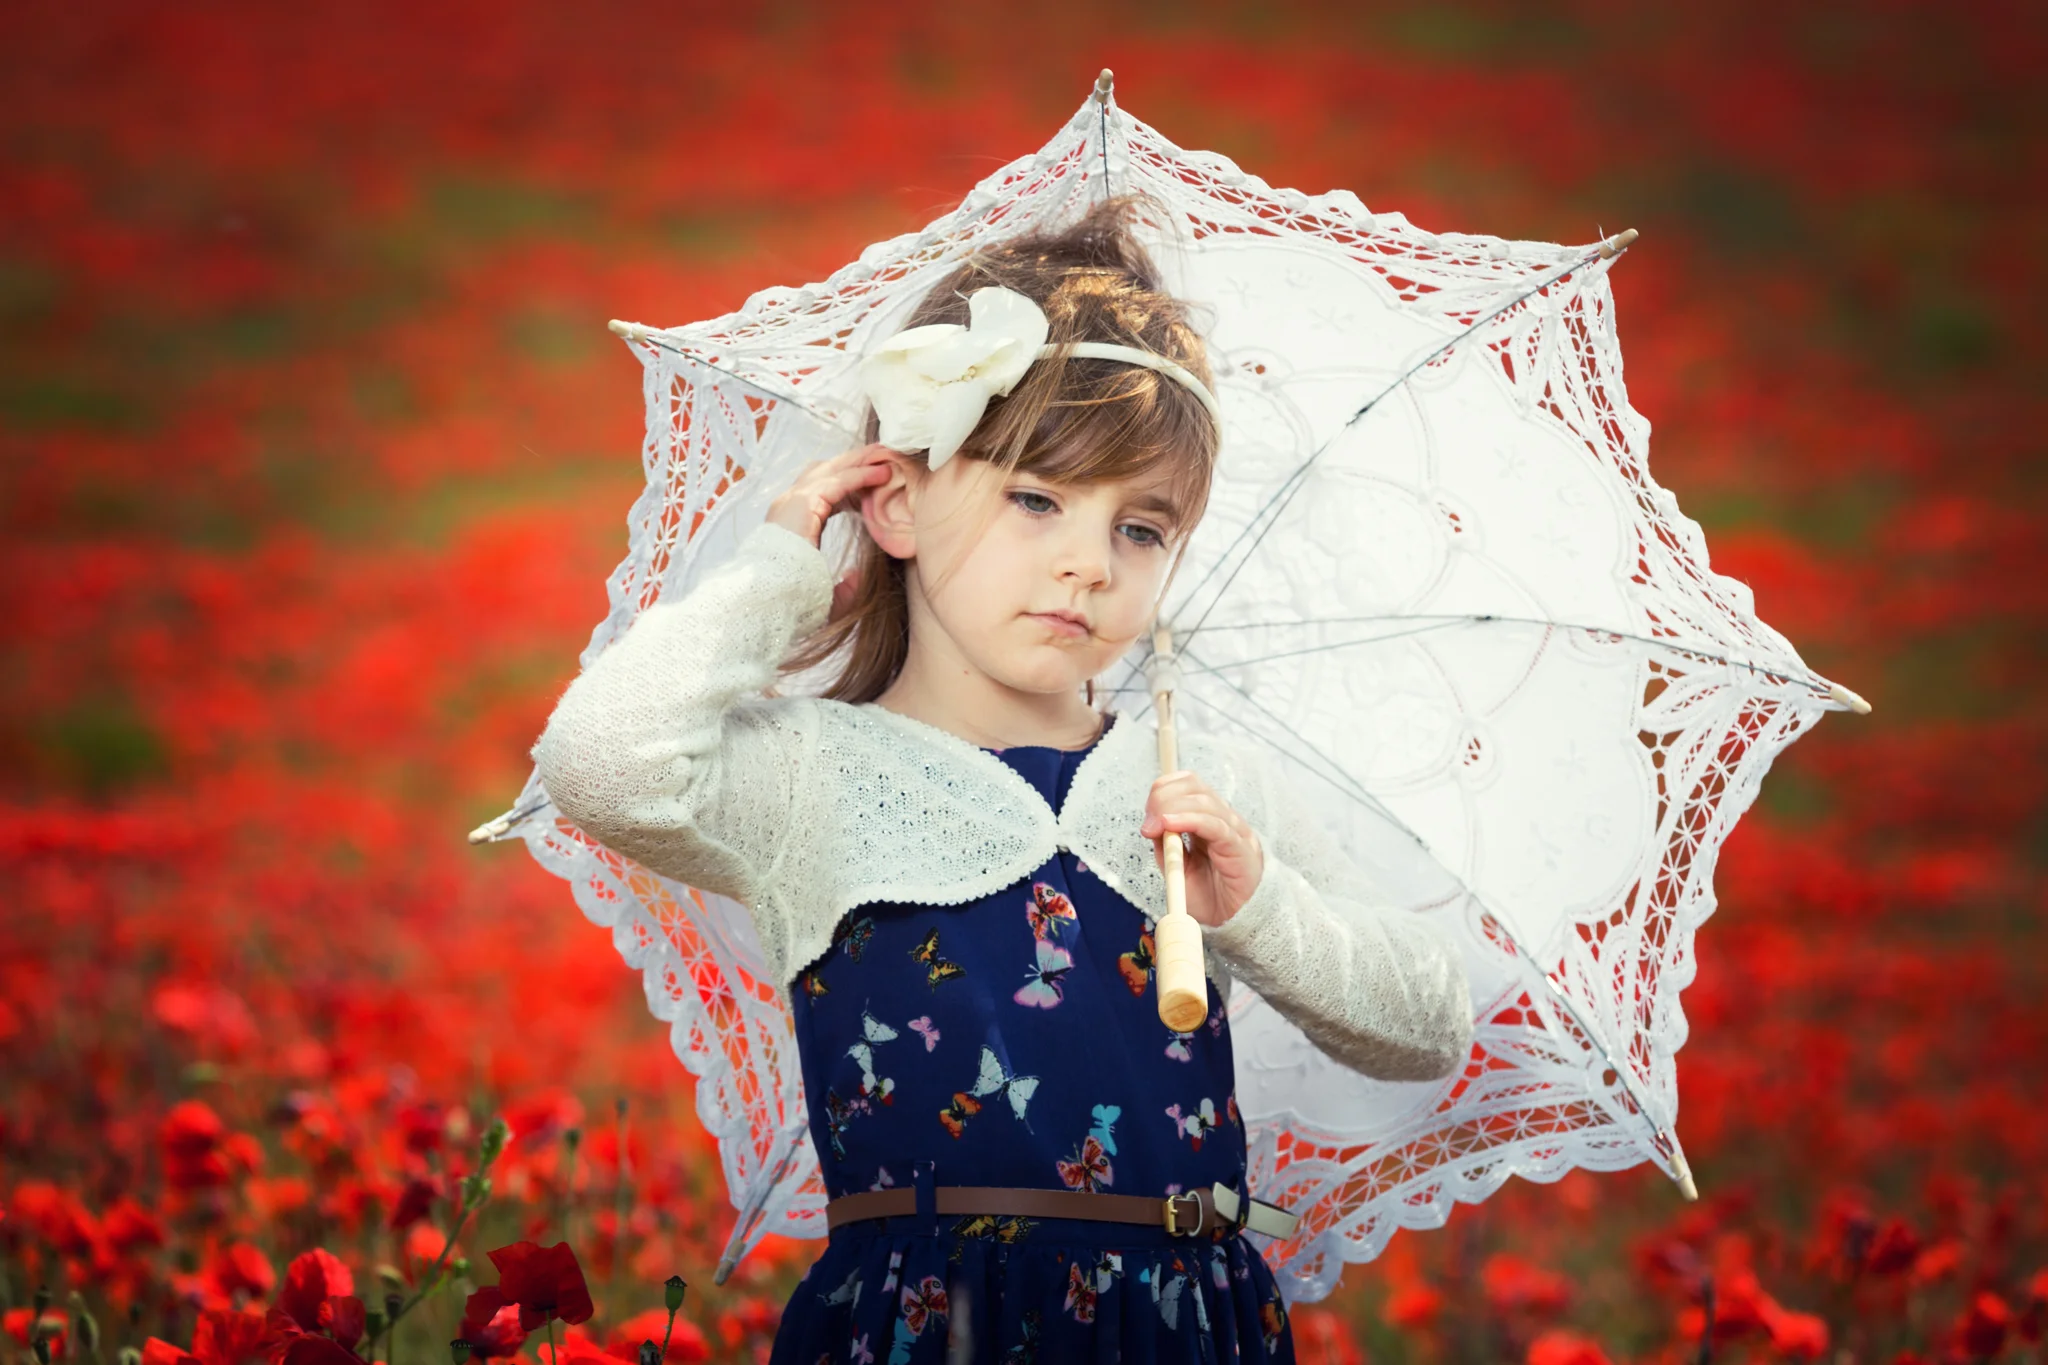
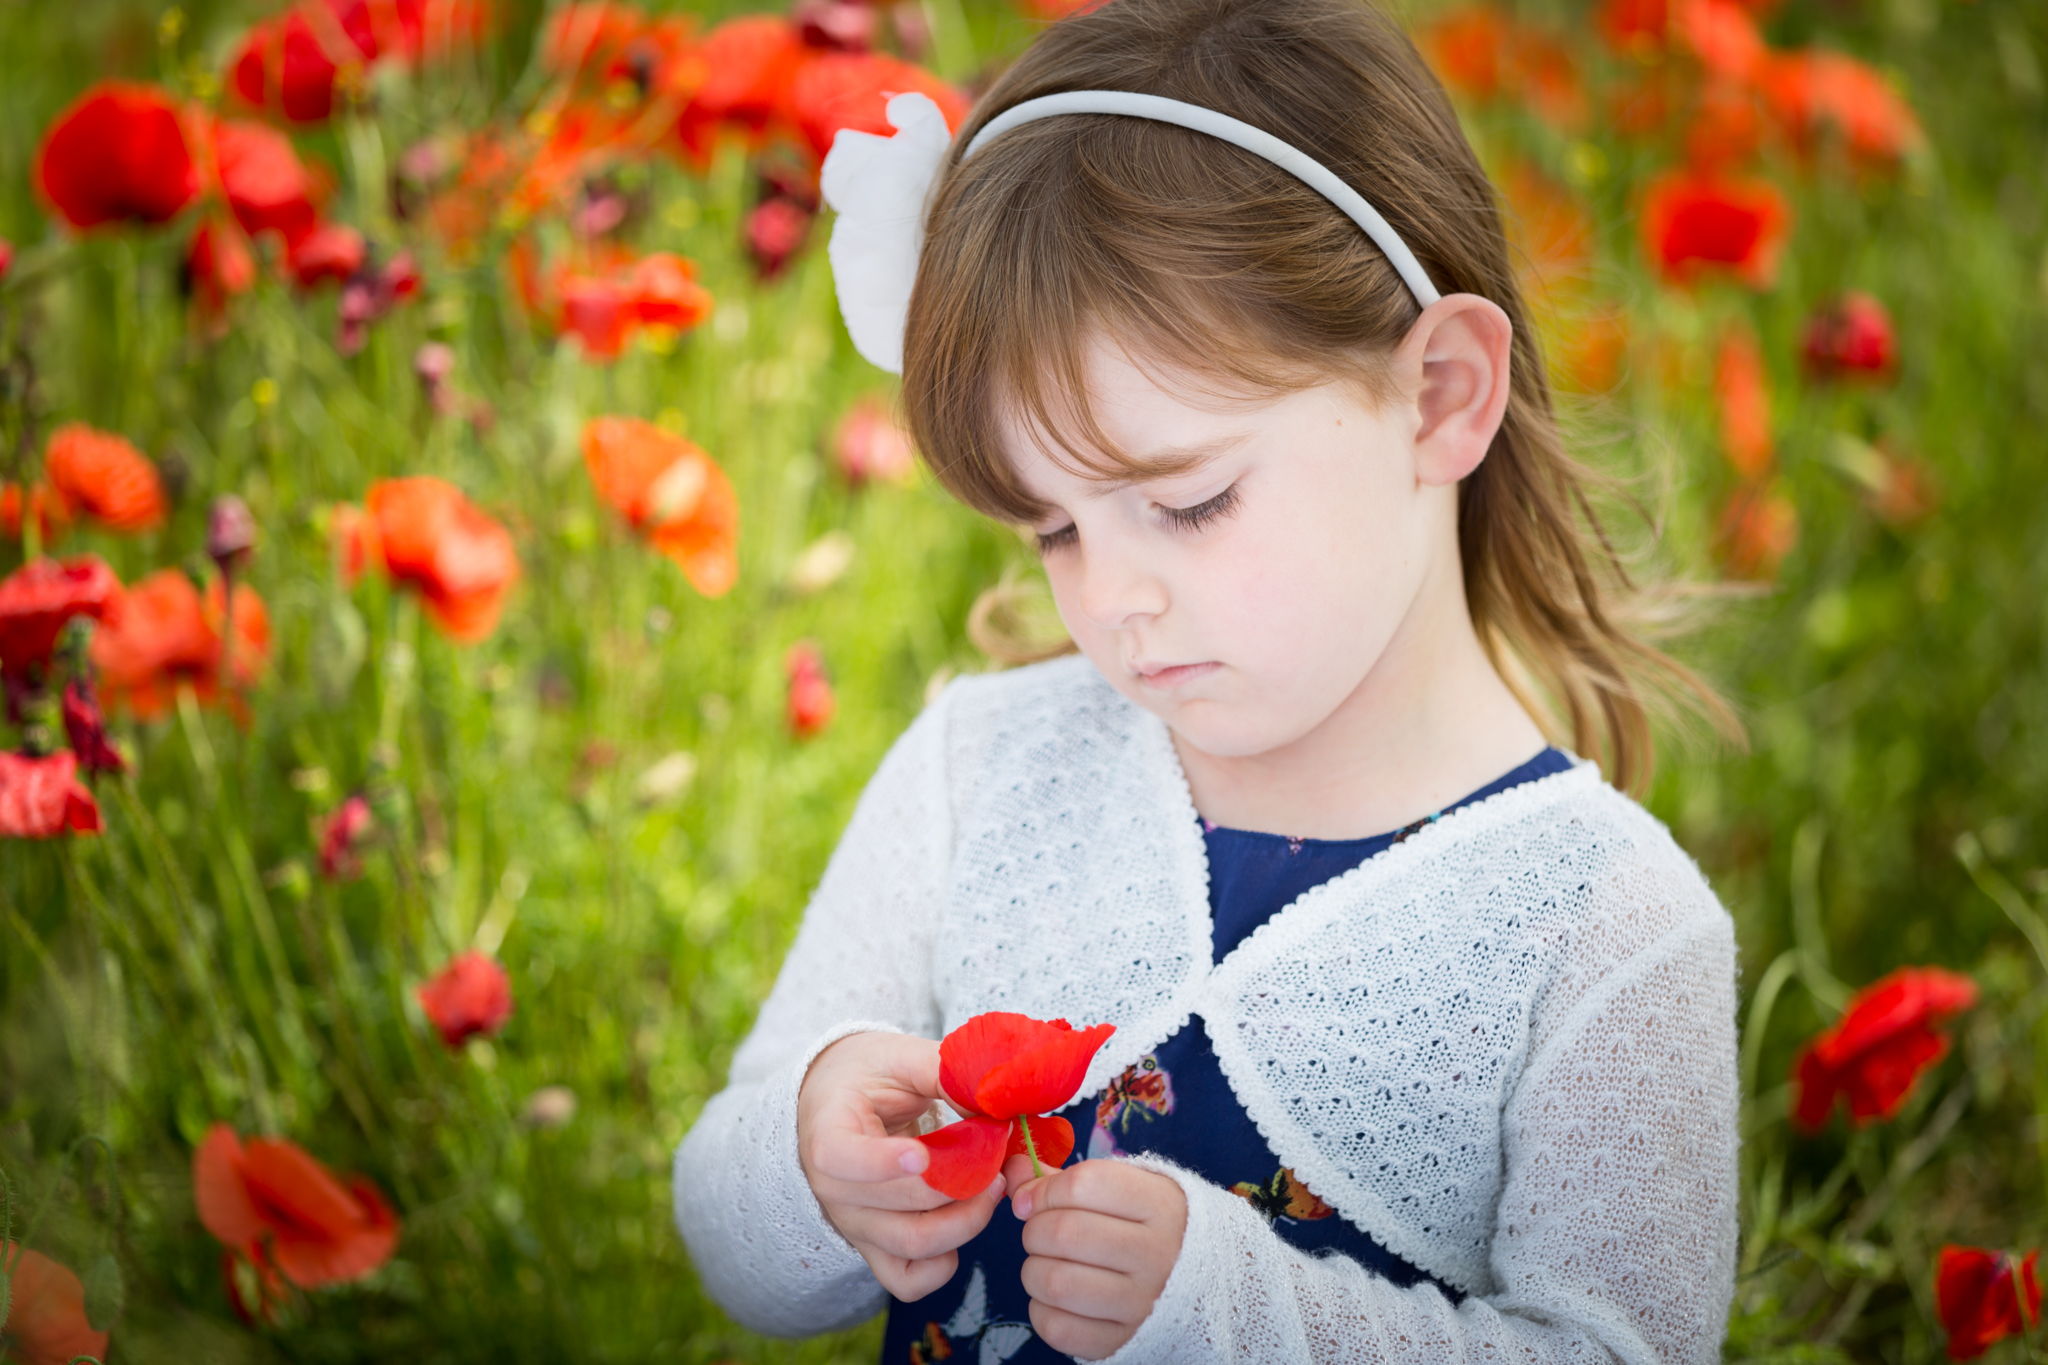
Off camera flash in poppy field
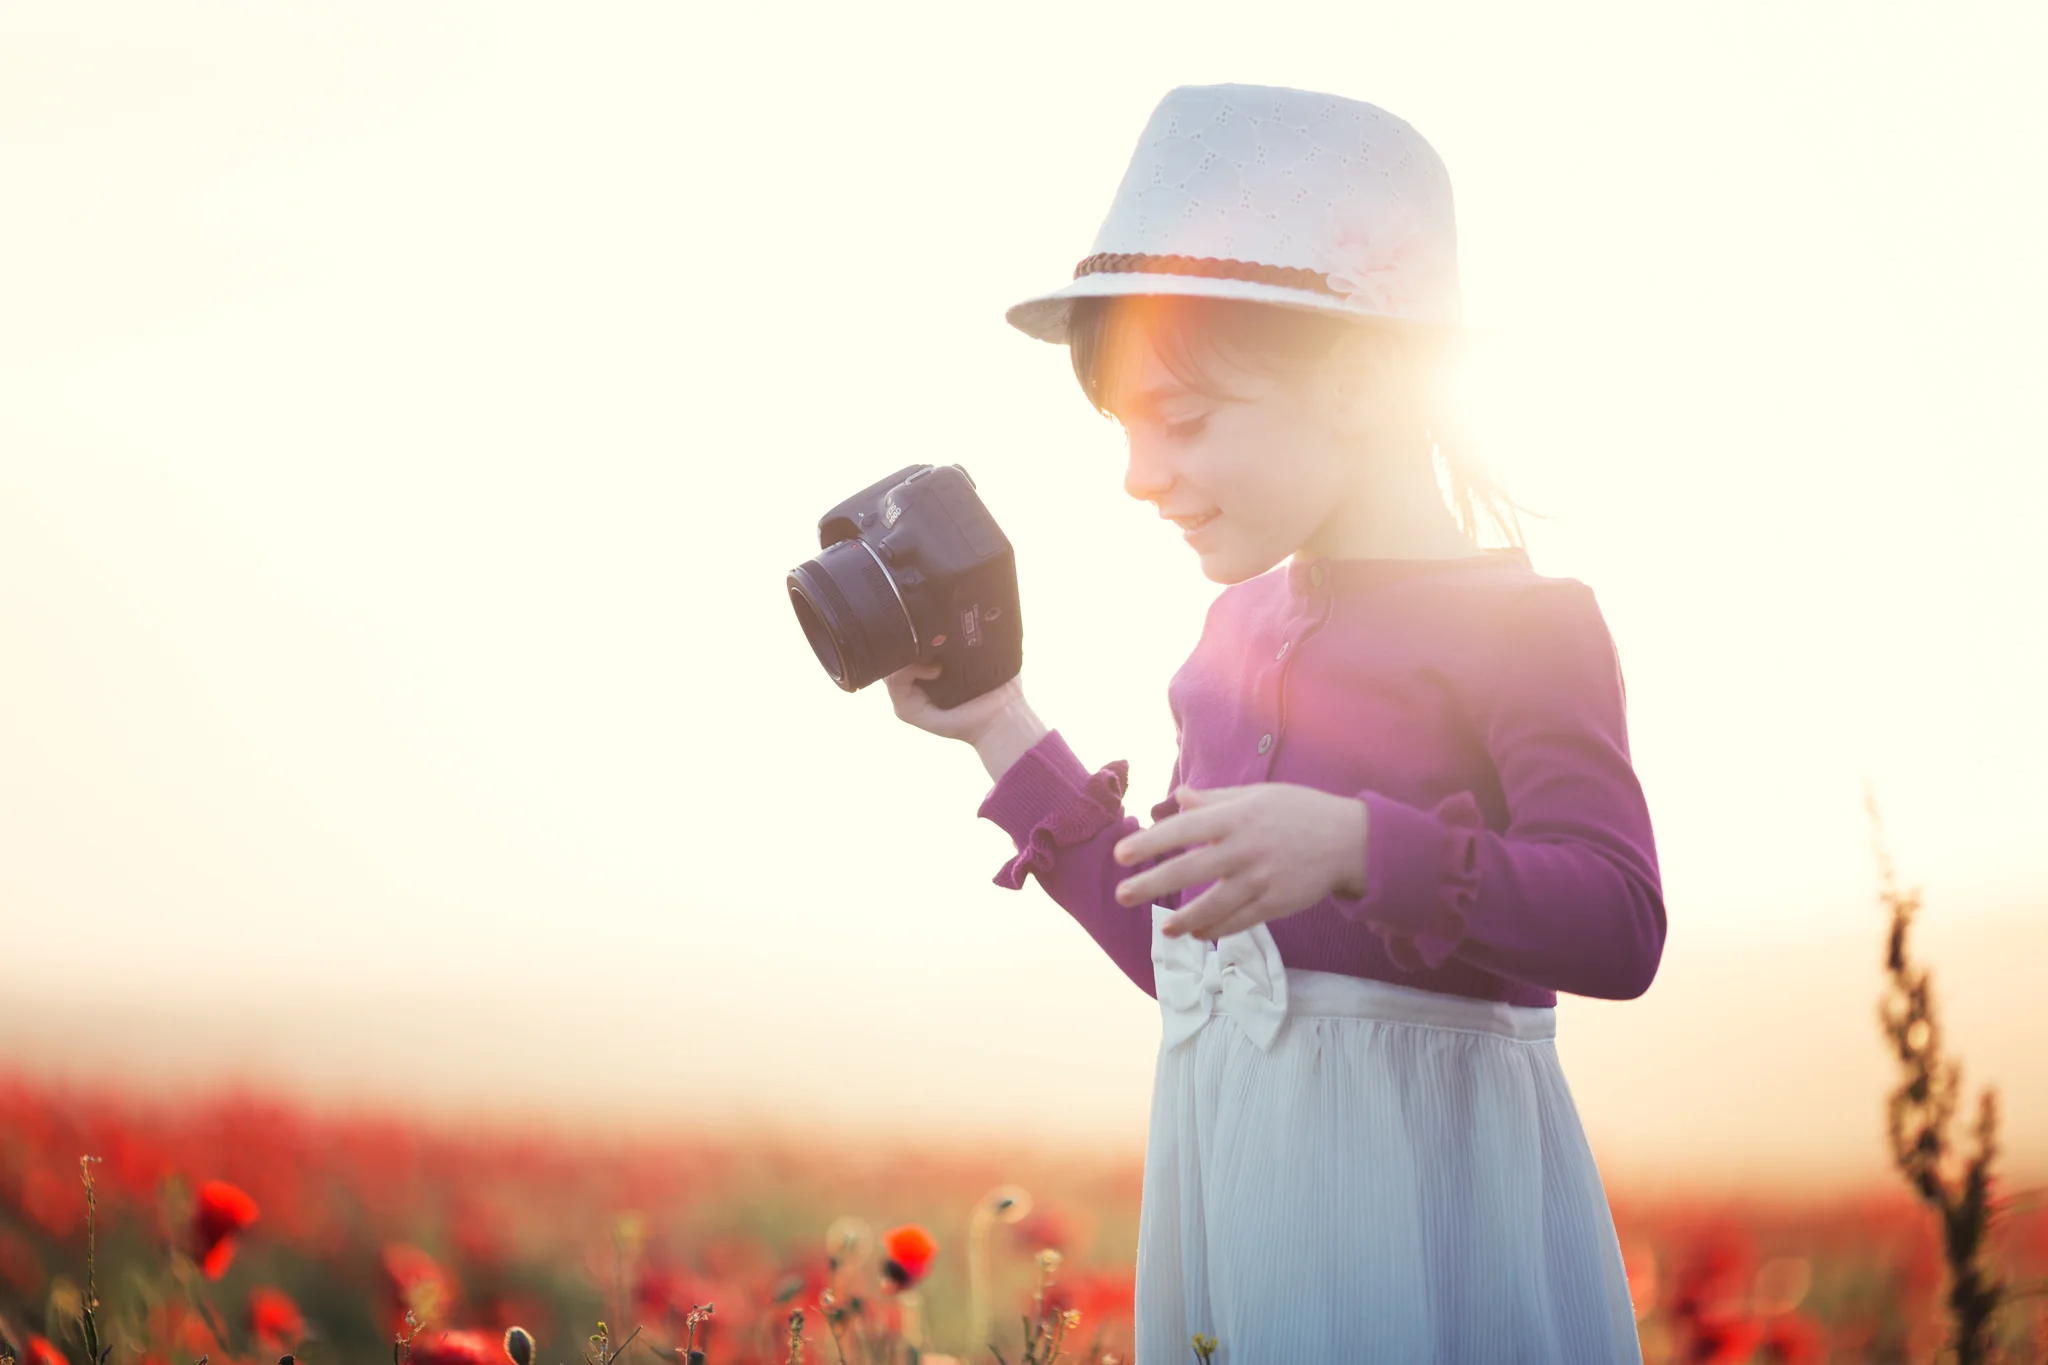
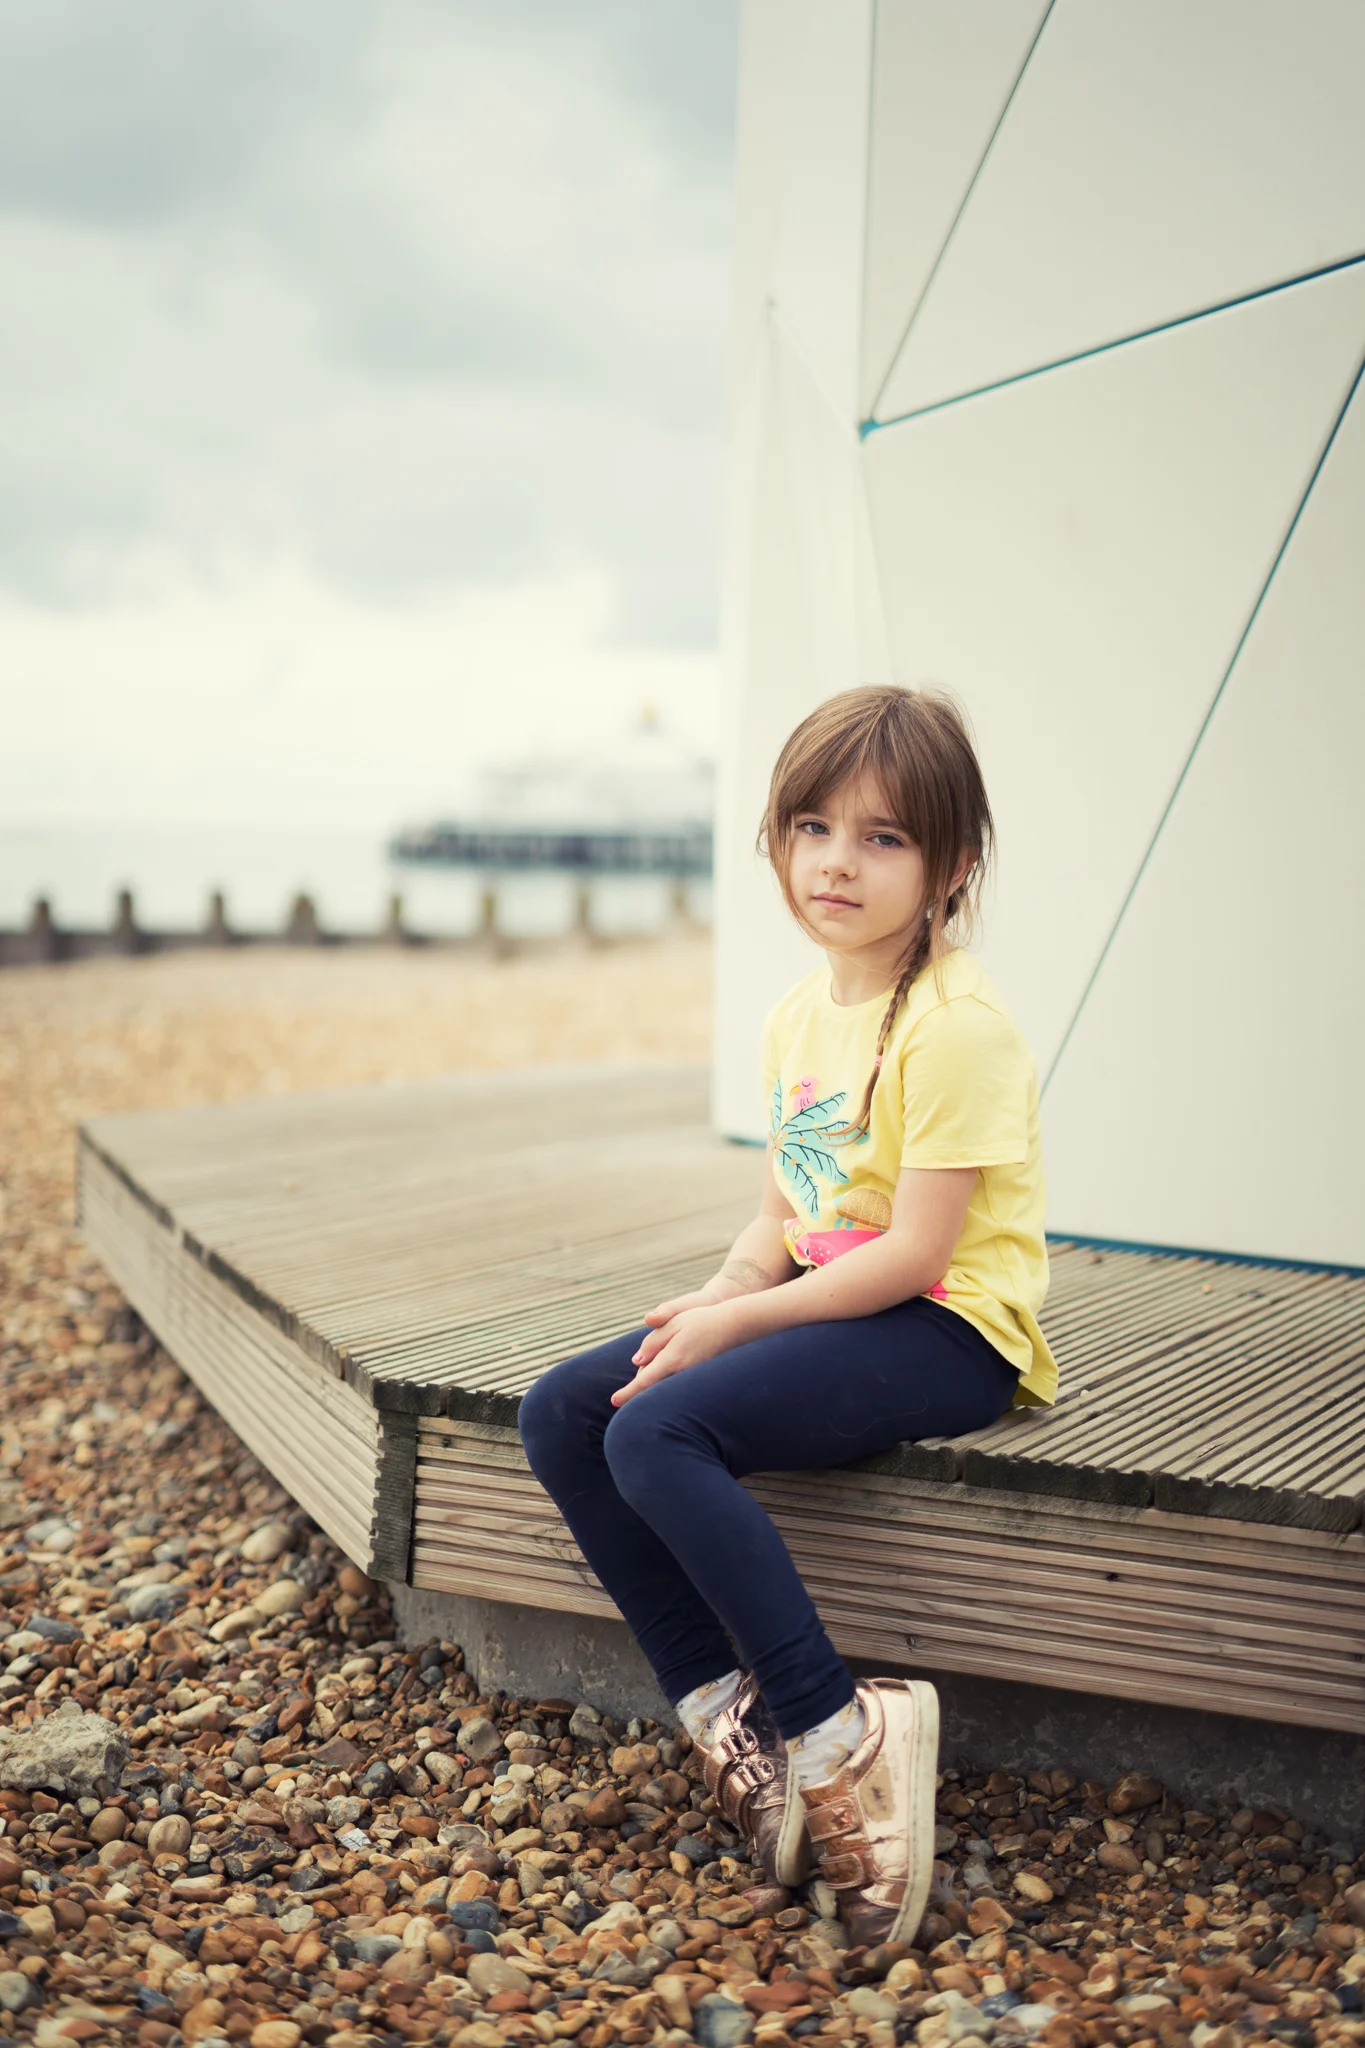
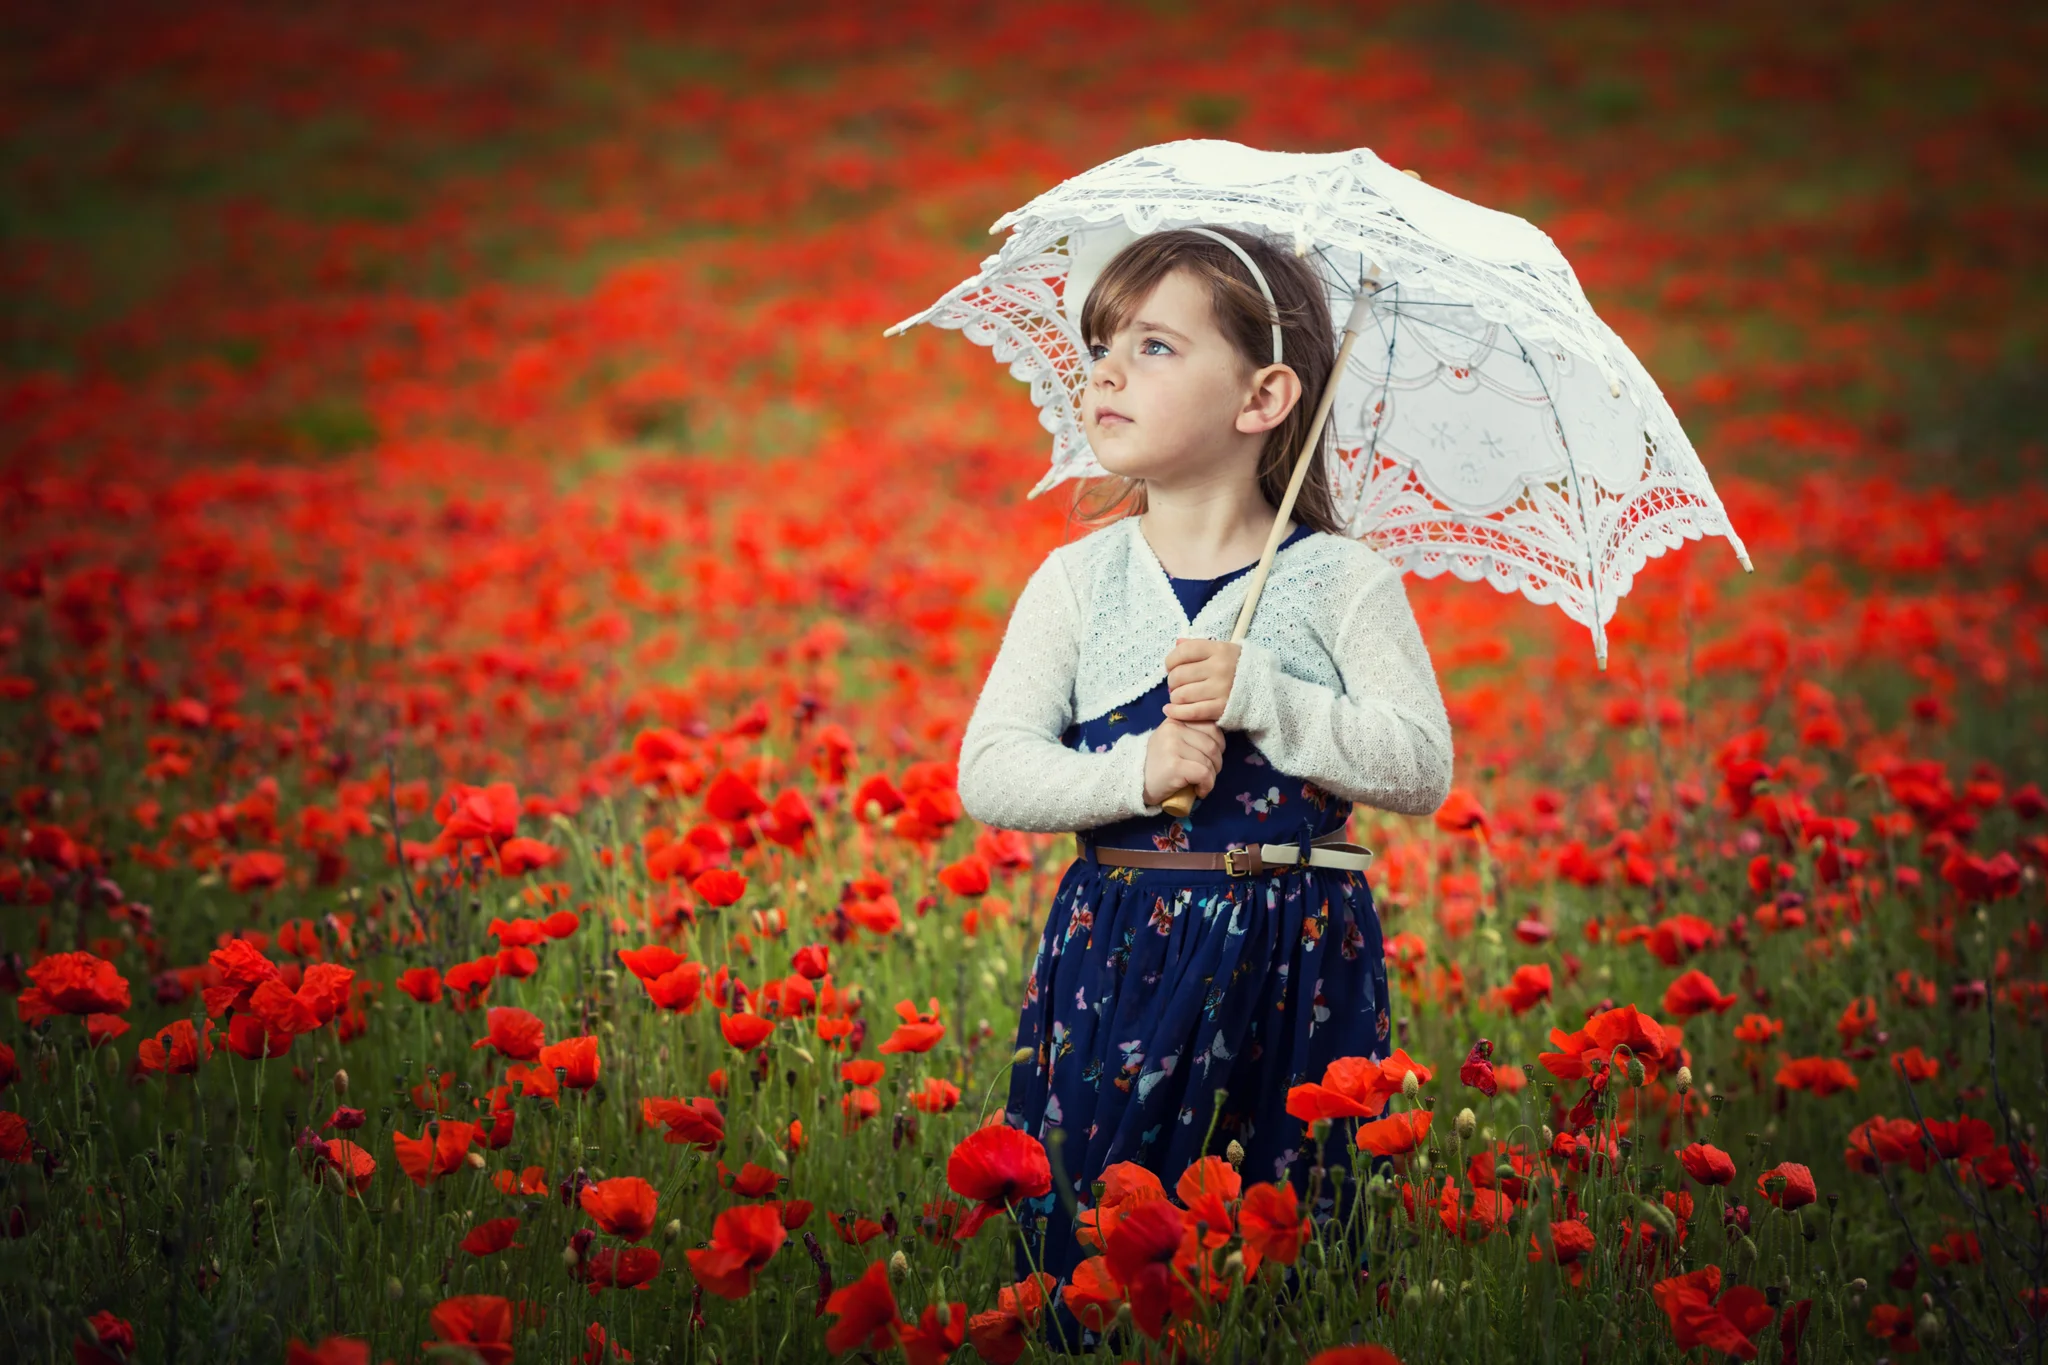
Natural light, sunset in poppy field
When you need to use flash
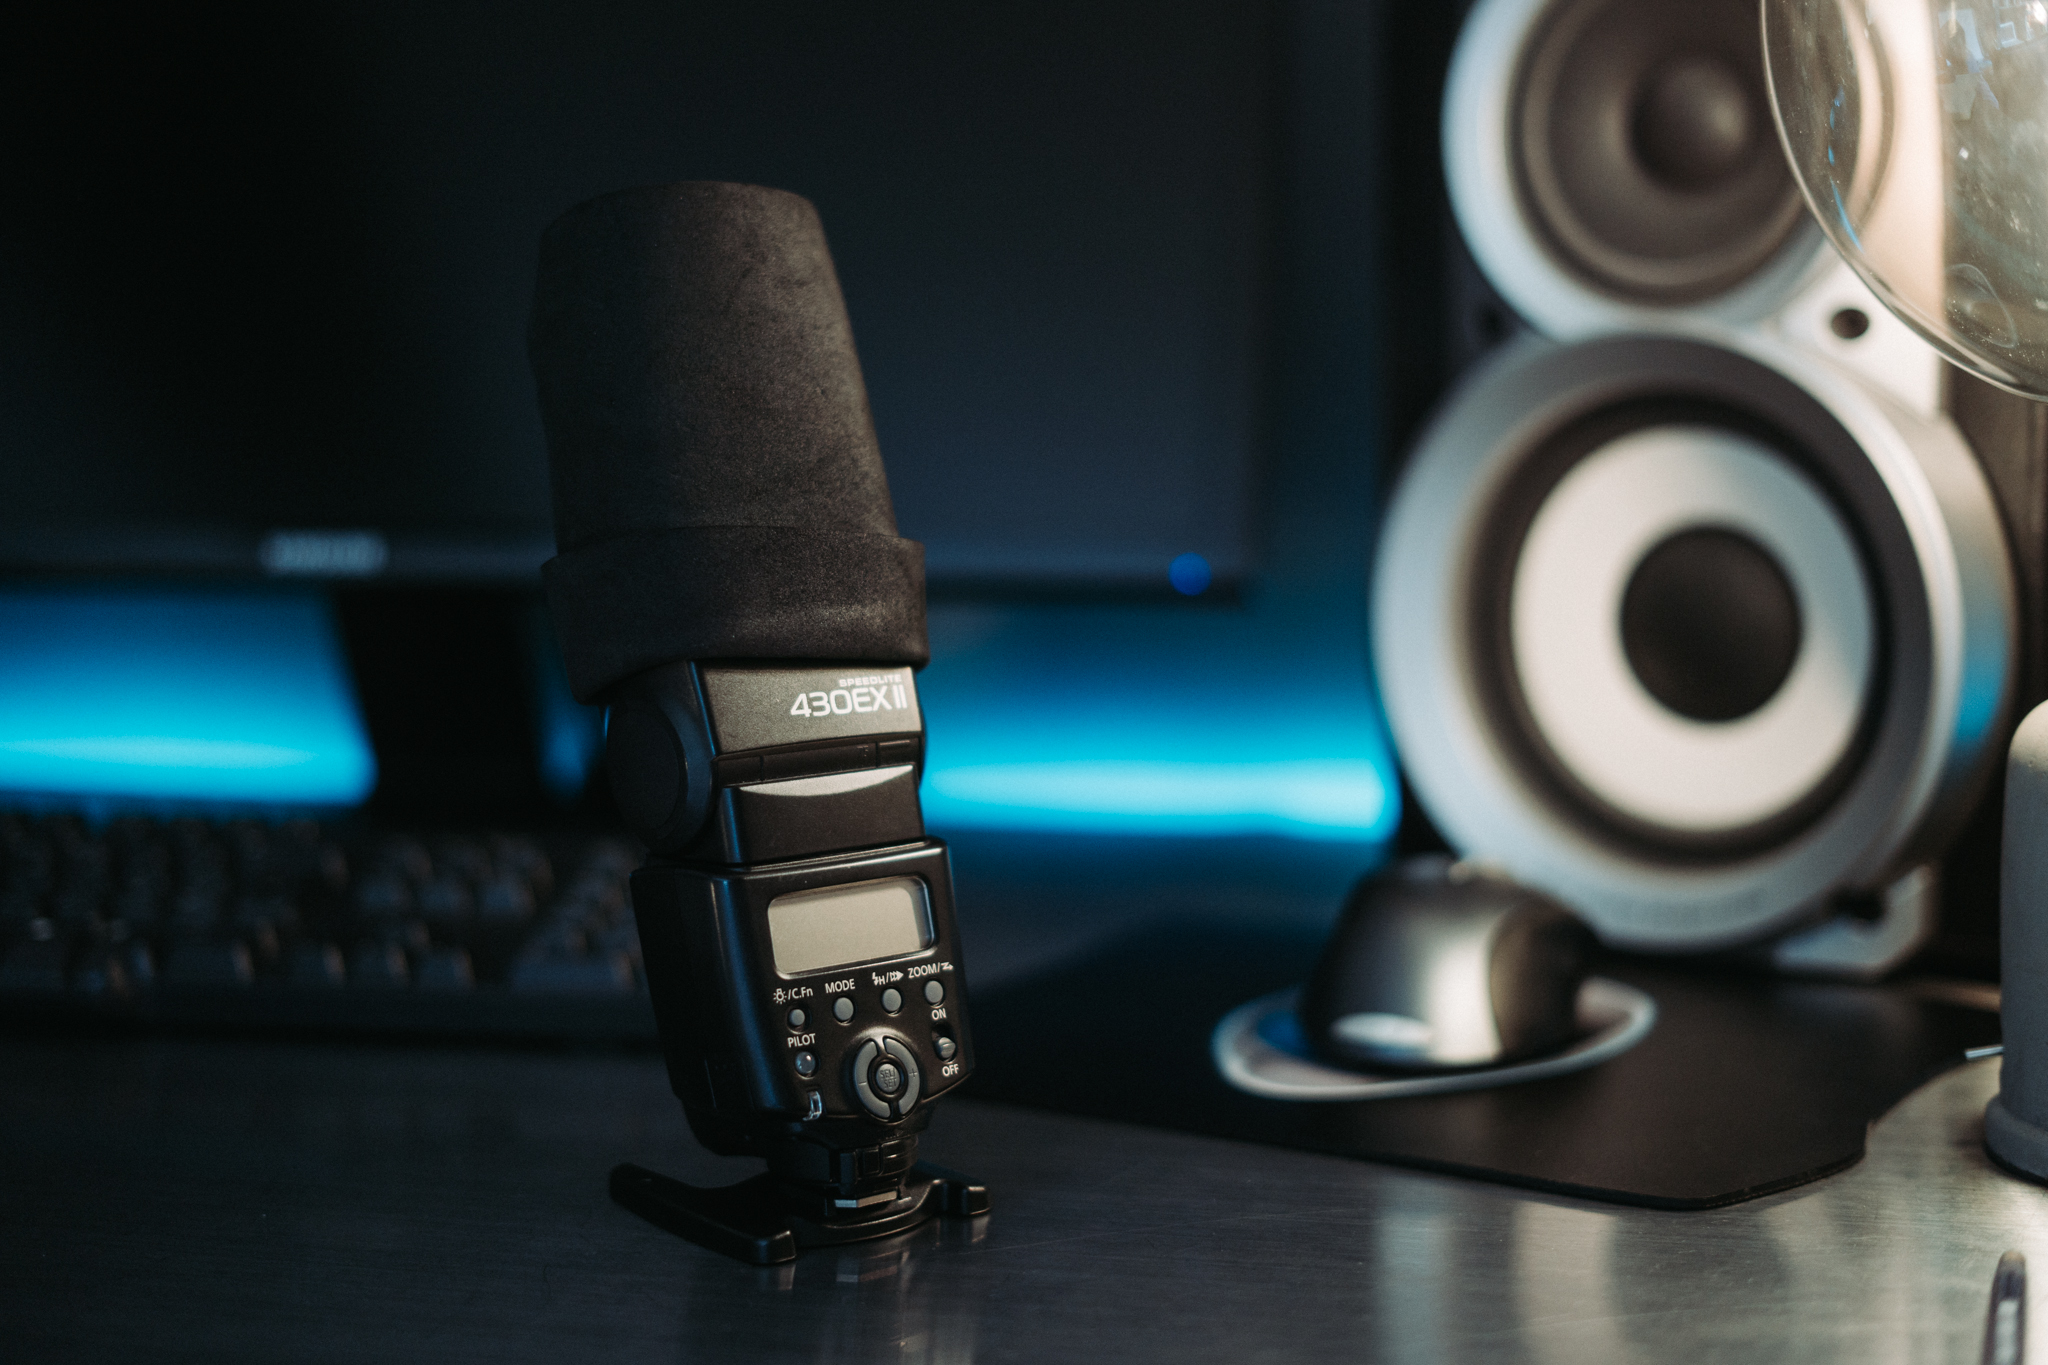
There are instances when you need flash, because of the technicalities of photography. Sure, cameras are getting better and better in low-light, but if the light in your venue is rubbish, a Sony sensor is not going to save the day! Typically, group shots require smaller apertures to get everyone in focus. If you are doing a group shot indoors at small apertures, you are going to be cranking up your ISO to uncomfortable levels. Only photographers care about noise, until it becomes noticeable. And what if your client wants that shot enlarged that is horribly noisy? Here is the perfect opportunity to add some in-fill flash. Whether you have noticed or not, most hotshoe flashes have an infrared part on the bottom that both assists with focusing in low light and the unit also sends out a pre-flash to figure out how powerful the flash needs to be at your current settings. This is known as TTL (through the lens) which essentially means that it is doing all of the calculations for you based upon the distances to your subject etc. So the flash is also going to help you with your focusing, which you can use without the flash firing FYI!
Deer in the headlights
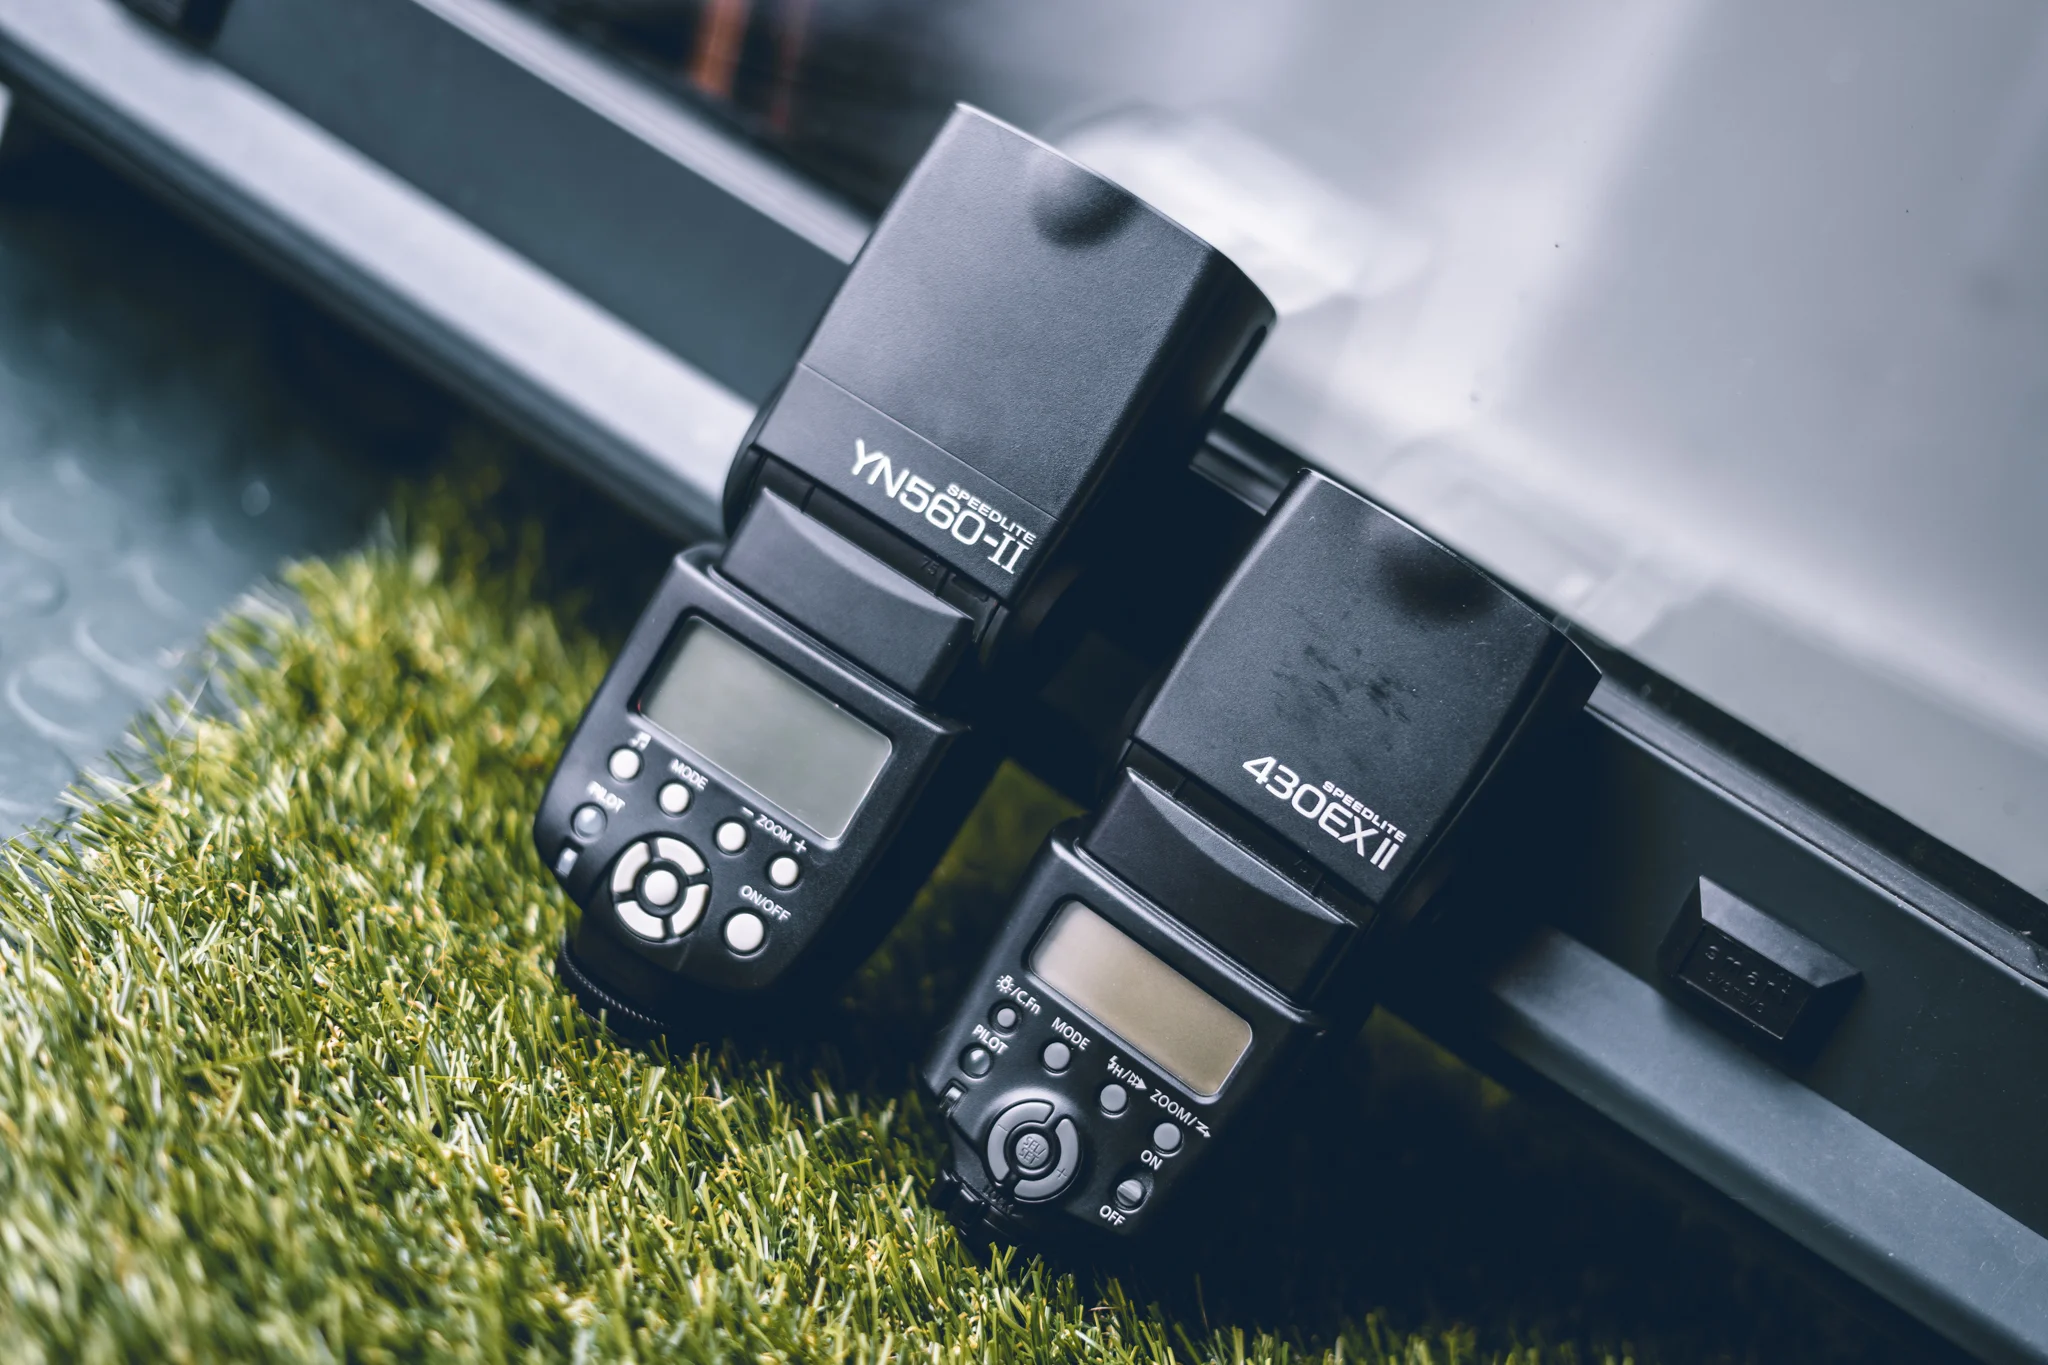
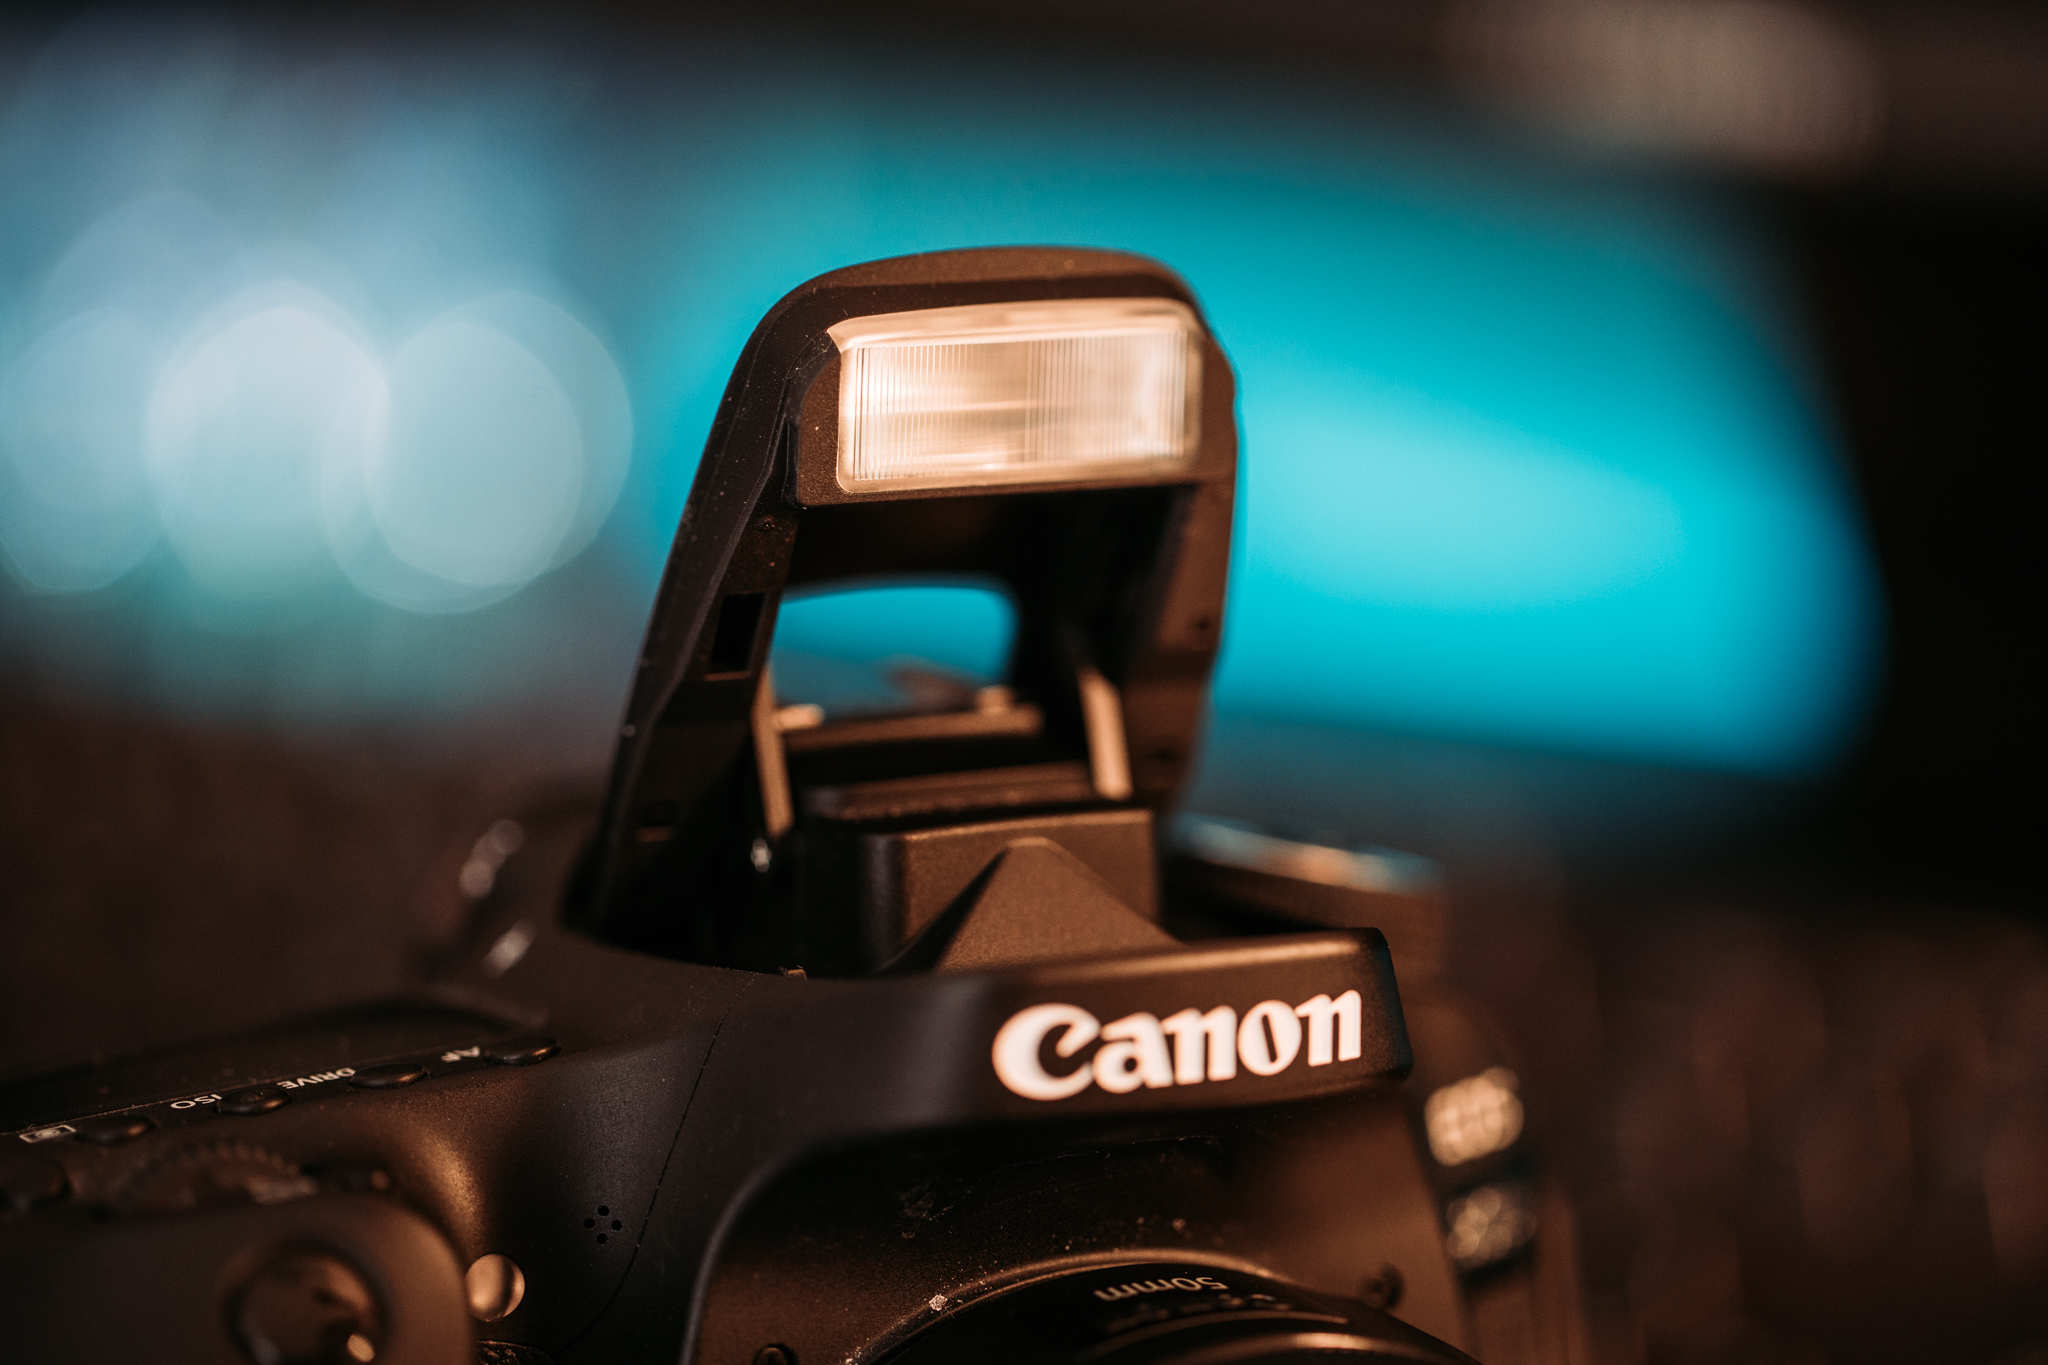
External flashes. Cheap Chinese version next to legit Canon version
The pop up flash that should be avoided at all costs!
A lot of photographers are afraid of flash because when you use the pop-up flash or an external flash, pointed straight at your subject, it is far from flattering. That is because it is a small/harsh light source (in comparison to your subject) and creates no shadows, except on a wall behind your subject. If you are lucky, you will even make your subjects eyes glow red like they have been possessed!
When you choose to use flash
Of course there are artistic benefits of using flash, rather than just needing to use it. Studio photographs are of course created using a variety of man-made lighting. The benefit of this is that you can create consistent results every time, because you have complete control over the brightness, quality and colour temperature of the light. Whether you know your settings off by heart, and where you lights are positioned in relation to your subject; with practice it will all become second nature. I use flash in the autumn and winter for indoor portraits, because there simply isn’t enough ambient light. I also use flash a lot when shooting architectural interior shots. I still switch on the majority, if not all, of the interior lights - but recessed spot lights do not make interesting lighting conditions. In this situation I use a large powerful light source in a soft box to lift the dark areas that you can get with high dynamic situations; especially when you have an interior with windows.

Image coutesy of SLR Lounge - Catchlights showing the window light
Have you ever looked at a portrait in a magazine or online and you look at the eyes and say to yourself, the detail and colour in the eye is just amazing. Well that is due to the direction of light. Look closely at the eyes and you can see the light-source. These are known as catch-lights. You can see the photographer’s secrets in these catchlights, where they positioned the lights and how many there were, even the shape of them. Note when you watch cartoon animations they add catchlights, the eyes don’t seem to look right without having a light-source reflected in the eye. The colours in the iris really start to ‘pop’ when you add off-camera flash, no need to photoshop them, they are good looking straight out of camera.
Since this is a competition, what are the advantages of using natural light?
It is free. And on an over-cast day it is very flattering. Unless you are going for high-contrast looking images, the aim is to get soft light with a natural fall-off for the shadows. You achieve this with as large a light source as possible. The sun of course is massive, but it is also very far away, hence it is harsh the majority of the time. At sunrise and sunset it is acting as side-lighting which is flattering for portraits, it is also warm because only the red spectrum of light can make its way through the atmosphere. The clouds that wrap around the planet create a massive diffuser for the sun, which results in soft light, although you still need to consider direction. A north-facing window is also great for portraits, or a window that does not have direct sunlight shining into it. If a window with sunlight is your only option, net curtains are going to help you out massively.

Portrait using natural light from the sun setting just out of frame
Another advantage is that you have less gear to carry around with you. Shooting with flash definitely slows things down.
Of course the results are very natural looking when you shoot with the available light. It is what the human eye sees all the time, and we don’t think anything untoward of a photograph taken in natural light.
There are other methods such as sheltering under a canopy, to avoid the ‘panda eyes’ that you get from when the light-source is directly above you, and this way you get directional light from the open areas around the canopy. This could be a canopy of a building or the edge of a forest, as long as you are not in direct sunlight you will get a good quality of light when there is cover over-head.
Overcast light provides a diffused light source, flattering for portraits
I would strongly recommend that you check out Neil Van Niekerk’s book called “Direction & Quality of light”. It will teach you everything that you need to know about working with natural light, it is a great read.

Two of the books that I have read regarding light and using flash for portraits
Reflectors
Under the category of natural light also falls using a reflector. These are cheap, light-weight and they fold up nice and small. More expensive versions have handles so that you can hold the reflector in one hand and camera in the other; if you shoot alone that is. I use reflectors to lift the shadows in the eyes and to add catchlights - which really makes a difference. Also, if you are on location, say a poppy field (which never has any shelter from the sun), then you can remove the silver and gold sleeve from the reflector and inside is a diffuser. Just put the diffuser between the sun and your subject. You will need to shoot a tighter frame, but now you have a directional and soft light on your subject. Ta da!
Back to using flash
There are different levels of flash. A small flash shouldn’t ever be your principle light source if you want flattering results. In most instances the ambient light, whether that is natural light from the sun or interior lights within a room, will be the main light. The flash that you add to that scenario will be just a pop, an infill to light the shadows a little. Be careful to avoid your subjects being close to wall, if you want to avoid their shadow lurking behind them. Even if you are just using your flash as a fill, there is still the limiting factor of your shutter speed, which I will cover below.

Powerful budget strobe made by Yongnuo.
If you are shooting indoors then consider, if your flash has a rotating head, bouncing the flash off a wall or a ceiling within reasonable proximity. This essentially creates a light-source that is the size of the wall, making the light a lot more flattering. If the wall is coloured though, so will the reflected light, so be careful!
Neil Van Niekerk has invented something called the ‘Black foamy thing’ which is rudimentary but controls the light falling on your subject - even when bouncing light.
If you are shooting outdoors, of course there are less walls, but if you have an assistant you can always shoot through a diffuser or bounce the light off a reflector.
Flash as your principle light-source
This is often termed as strobism, and you will have seen lots of urban type model photo shoots at iconic locations around the world. For this type of photography, especially if you are trying to compete with the sun, you will need a powerful light source. This is where the problems start, because you want a large soft light source, so you put your flash in a soft-box; but the diffuser panels absorb light to diffuse it. Now your flash is half or a quarter of the power it was out of the soft box. Out in the sunlight you are going to need a powerful light, more than likely a step up from the flash that sits on your camera, a dedicated studio light that takes an external battery - so that you can lug it into a field. I use a 600W Godox with a very large softbox, primarily for lighting up interiors.
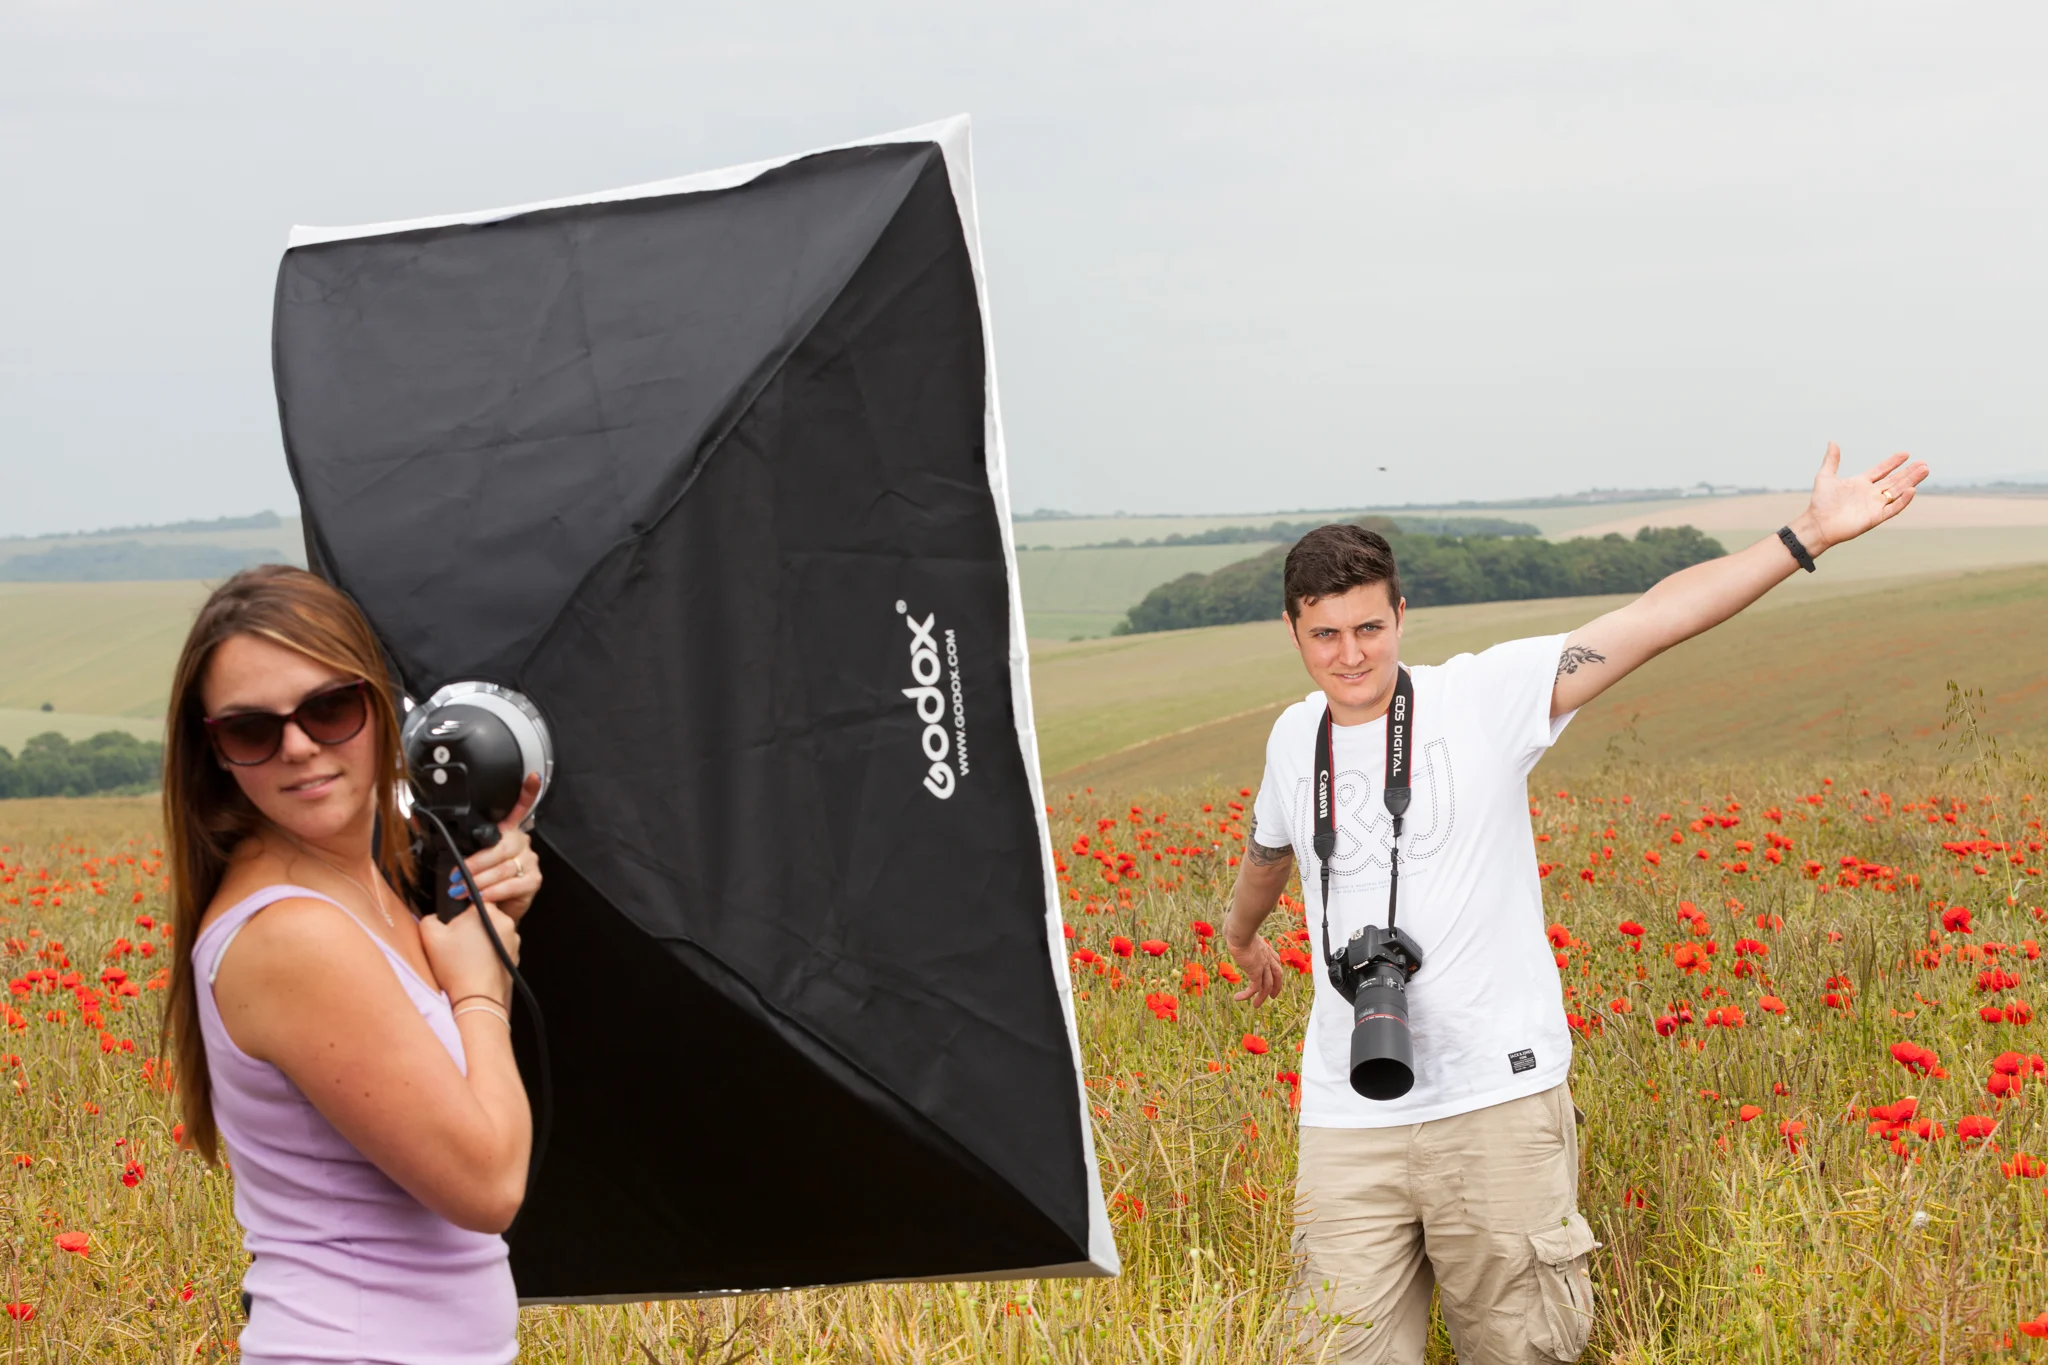
Off camera flash is not a one-person gig. Convince other people to come with you!
Go back a step
Let’s talk about why people are afraid of flash. Everyone has tried it, but you won’t get great results without know what you are doing. There are too many settings that need to align for a successful outcome. If you were just getting to grips with photography, then you now understand the relationship between shutter speed, aperture and ISO. Now that you are toying with flash, you have flash power and distance to your subject to consider now. Oh, and you can’t use fast shutter speed like you are used to when shooting at f1.8. No doubt, if you have dabbled with flash, and you took a photo at a fast shutter speed - there was a black line across your photo, or it is completely black. At first I thought I had broken my camera.
Flash SYNC SPEED
Trust me, this is all you need to know. Each camera has what is known as a flash sync speed. Look up yours, and don’t shoot above that when using flash. Essentially, any faster than that and your camera starts to take a photo of itself. Moving on. There is an exception to this, which is high sync speed, which although you cannot see it; creates a strobe from your flash to overcome this issue. But because it is pulsing a lot of times it reduced the power output of your flash and it will flatten the batteries much quicker. But it is an option if you need it.
The rules are now reversed to what you know about photography. Shutter speed has no bearing on how bright your subject will be when you are lighting them with flash. Shutter speed controls the ambient light, lets assume this is the background. Aperture controls the power of the flash, which you also have control over on the back of the flash and via ISO, and by moving your flash closer to your subject. Confusing enough? Let’s break it down.
Setting up the shot
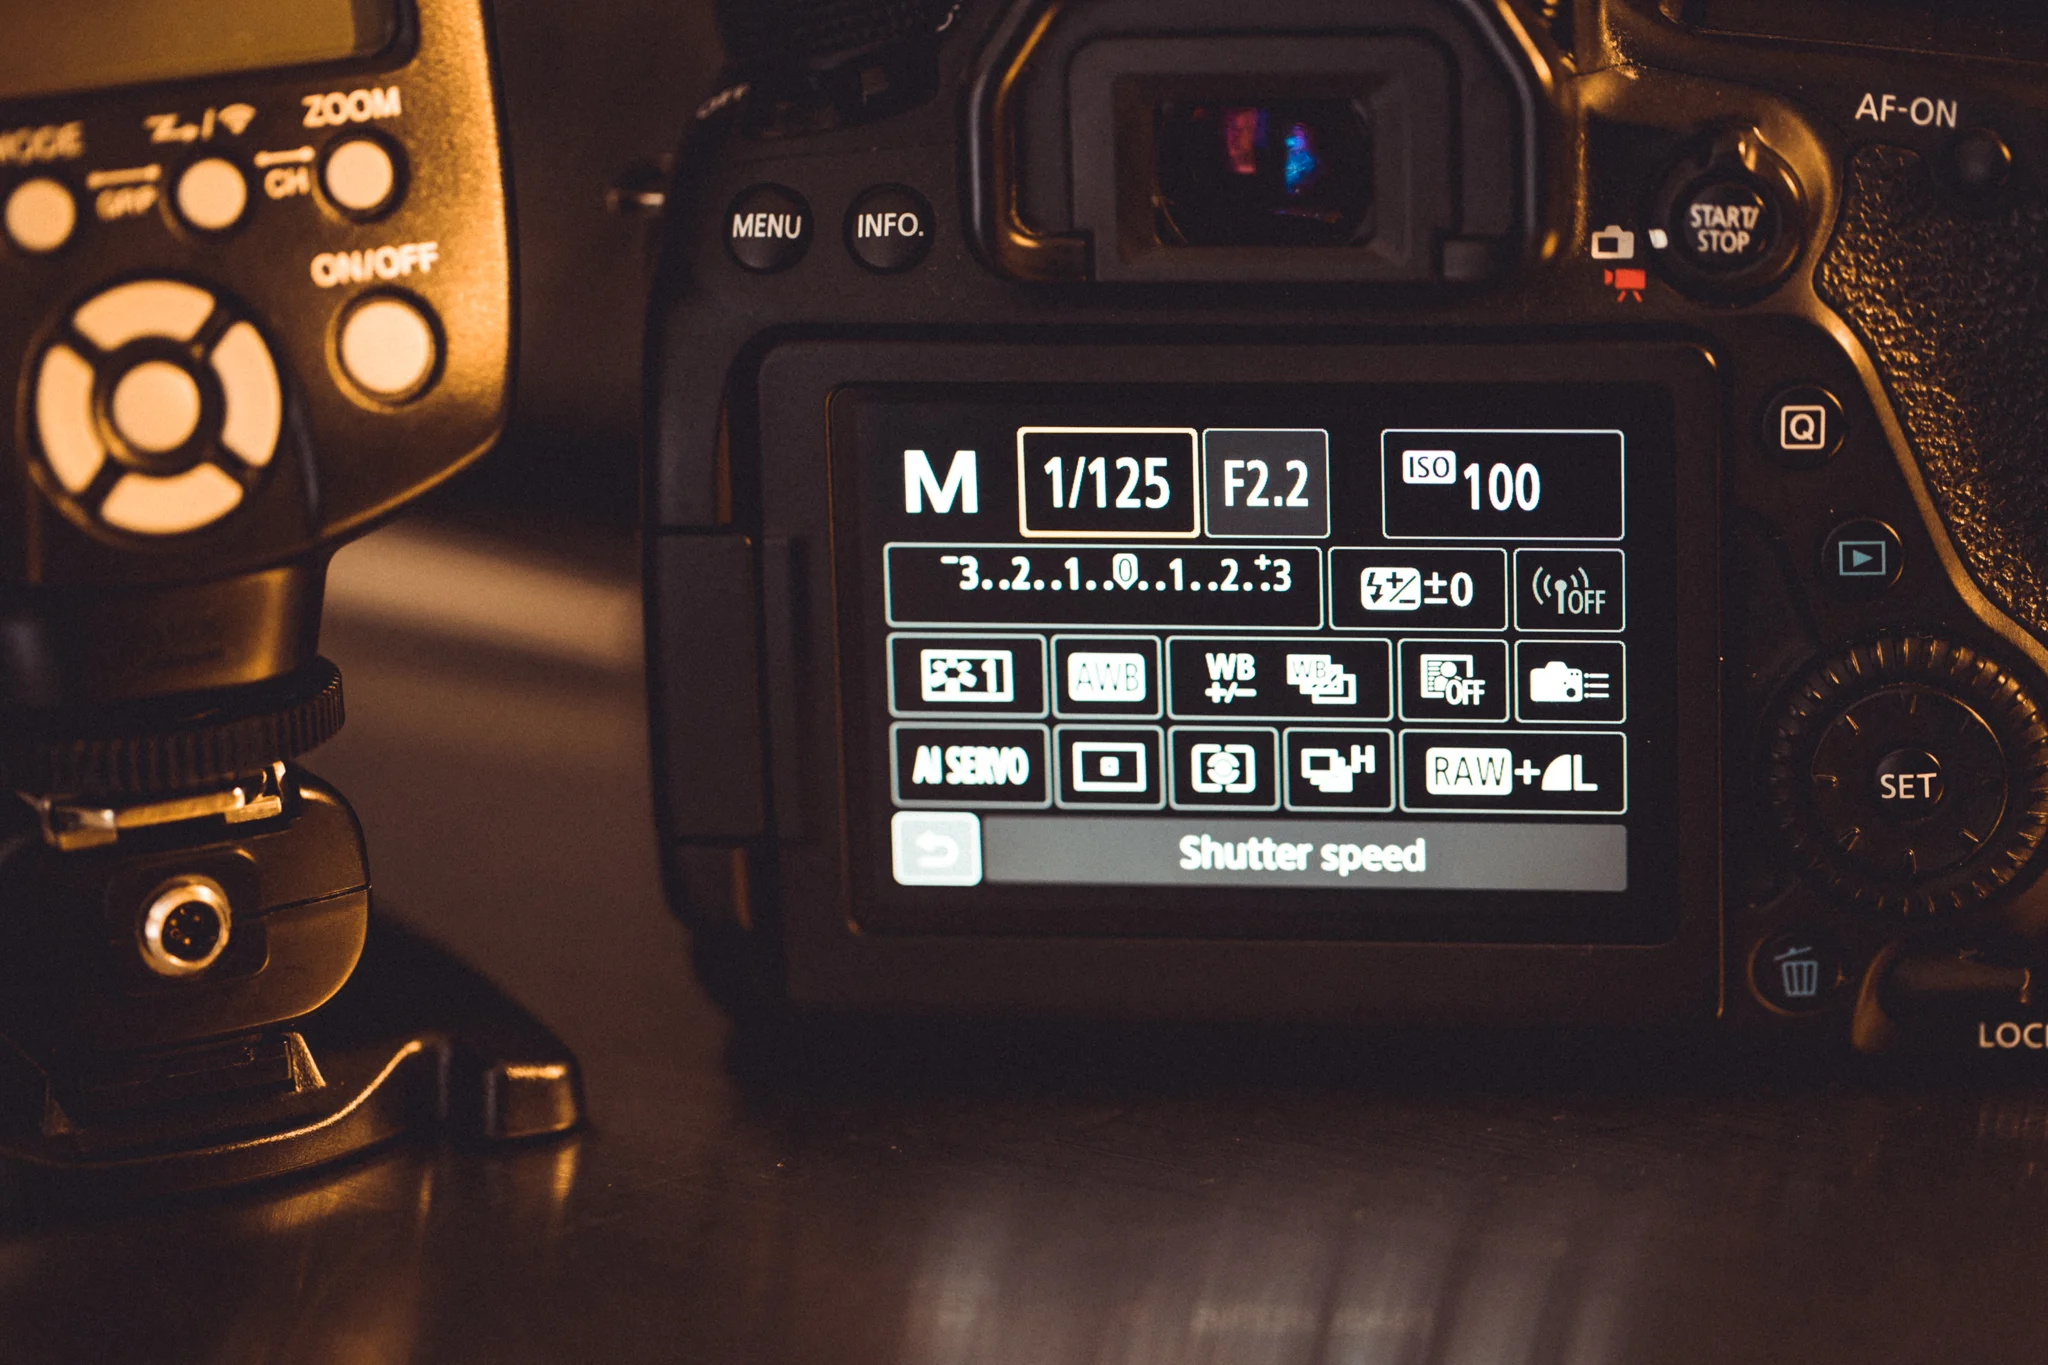
Your subject can relax for the moment, get them out of the frame and set up your exposure for the background. Let’s say you want to photograph your subject at f2.8, so that you can blur your background and concentrate the attention on them. ISO 400 is a good starting point, so that you can go up or down. If you start at ISO 100 then you have no option to change your settings down. I typically aim for a shutter speed of 1/125th on my camera. You can see that on a bright day, my shutter speed needs to be much higher than 1/125th at f2.8 with an ISO of 400, maybe even at ISO 100. So I use a variable ND filter to achieve the above starting settings. You can use fixed ND filters, but I like the flexibility of the unlimited amount of darkening that you get with a variable ND filter. The aim with the background exposure is to darken it by approx 1 stop to what the ‘correct’ exposure is, or to taste. This will make the subject really pop - but not look like you have stuck them on a background from another photograph.
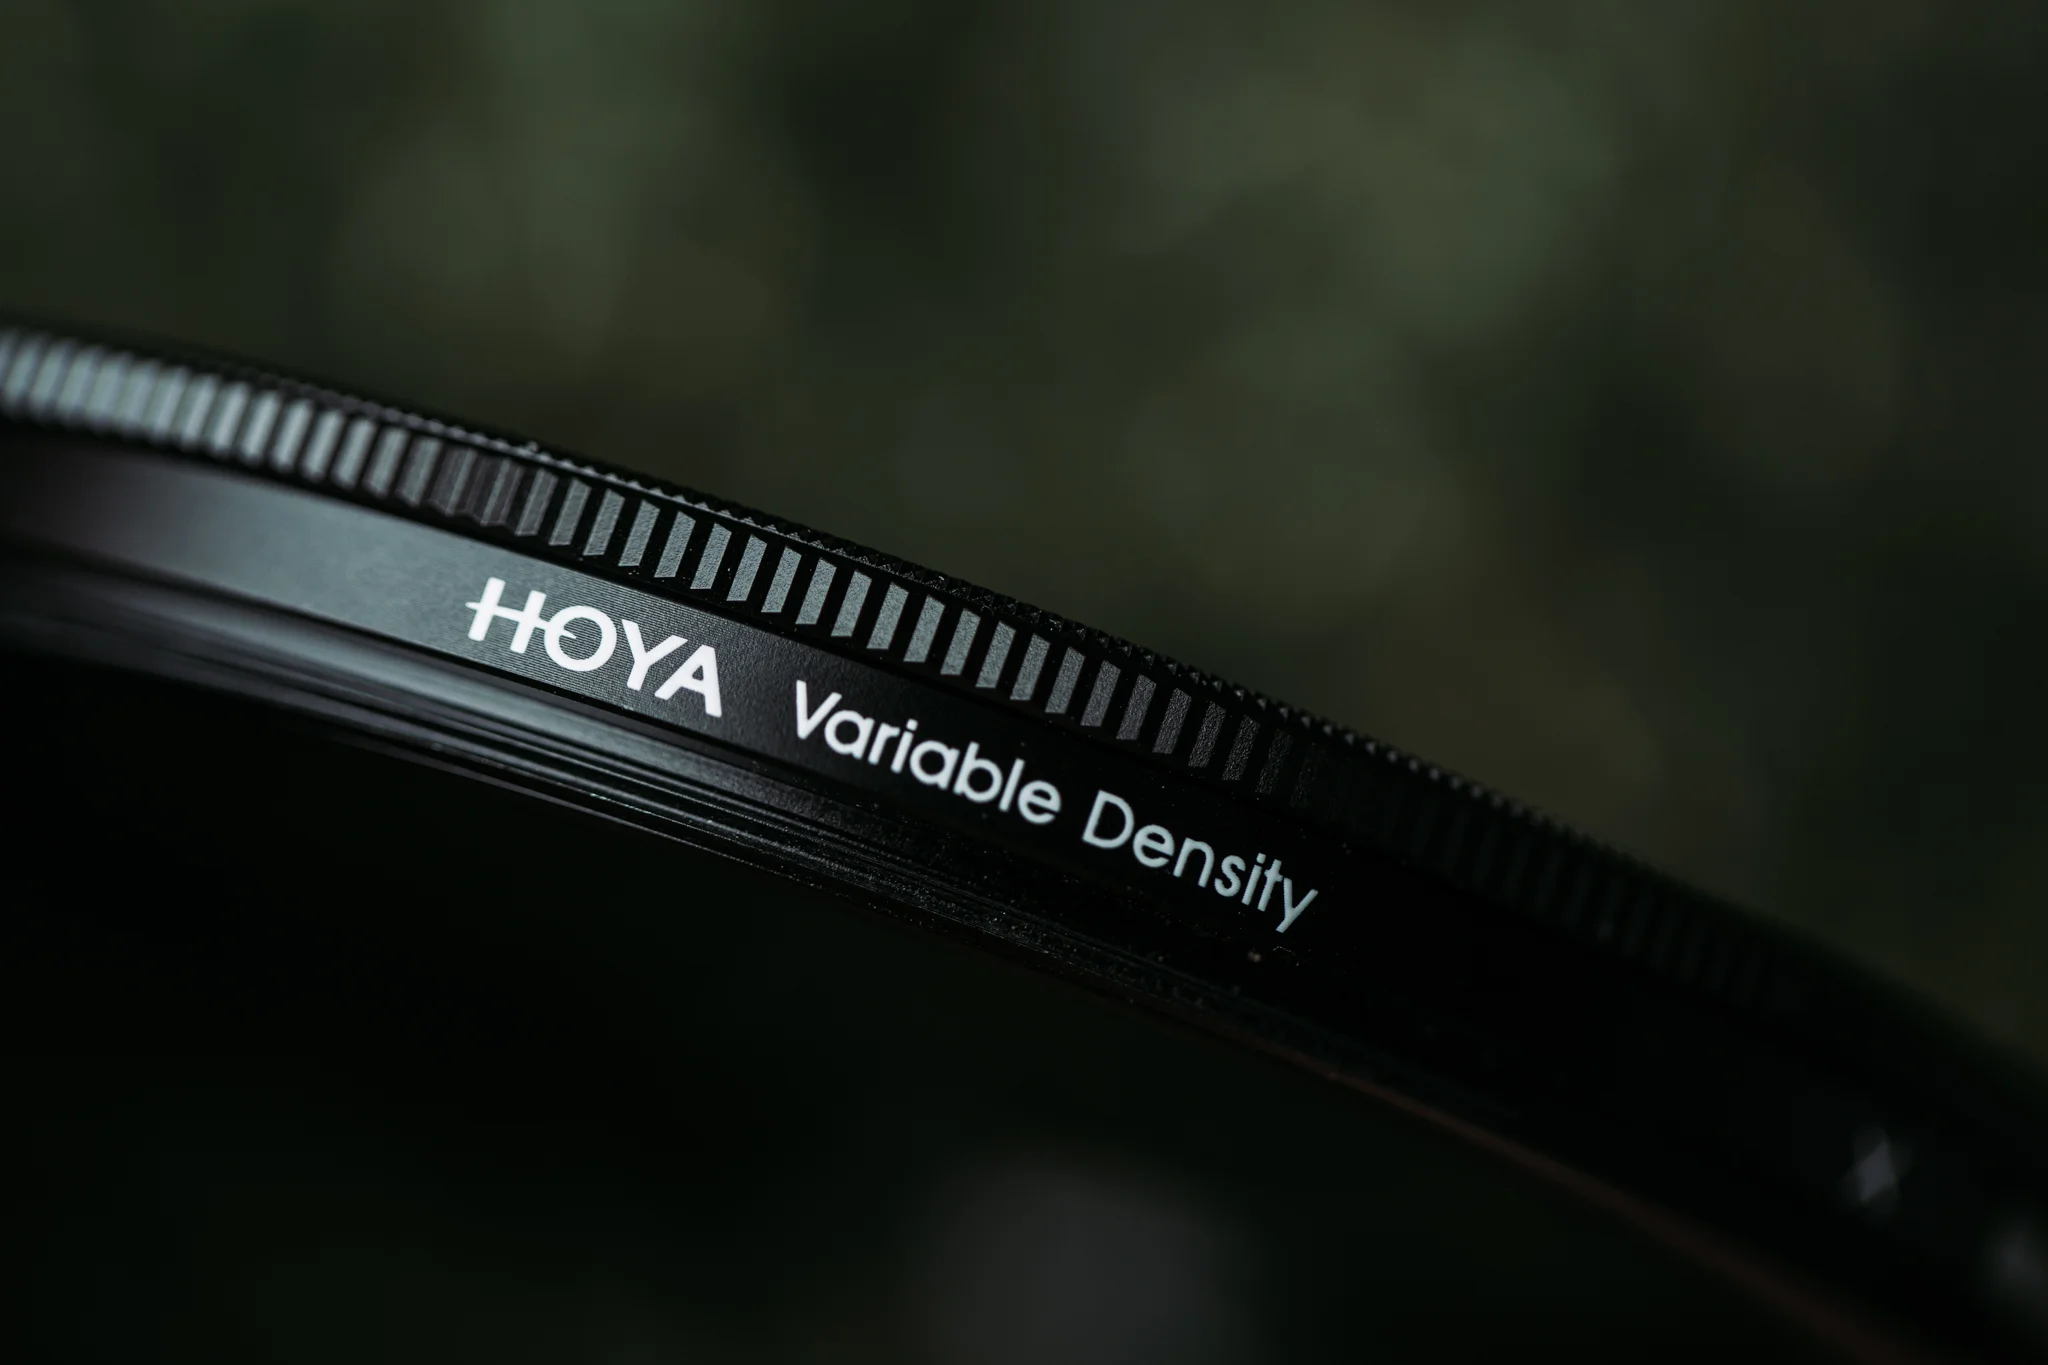
Variable ND filter that will give you control over shutter speed
Bring in your subject. Apart from focusing, you don’t need to be touching your camera settings now. To light your subject, you can move your light source back and forth or change the power on the back of the flash. The closer your light is to the subject without being in the shot, the softer the light will be. Just experiment from here, but remember not to change your shutter speed or ISO, because you already set up the ambient exposure.
Don’t worry about the inverse square law too much, but simply understand that when you move the flash back and forth, the amount of light does not change equally with distance. You have a digital camera, take some test shots and if it isn’t right, go again.
Take into account the colour temperature of these also, because most flashes and studio lights are daylight balanced. This is a deliberately cold light source that matches the sun colour at midday. If you are photographing someone at sunset, then you will need to put a coloured gel (known as colour temperature orange/straw CTO/CTS) which come in different strengths. Your flash will now look like warm sunlight to match the scene. This is also important if shooting in an interior that has a lot of tungsten light bulbs - which are very orangey/yellowy.
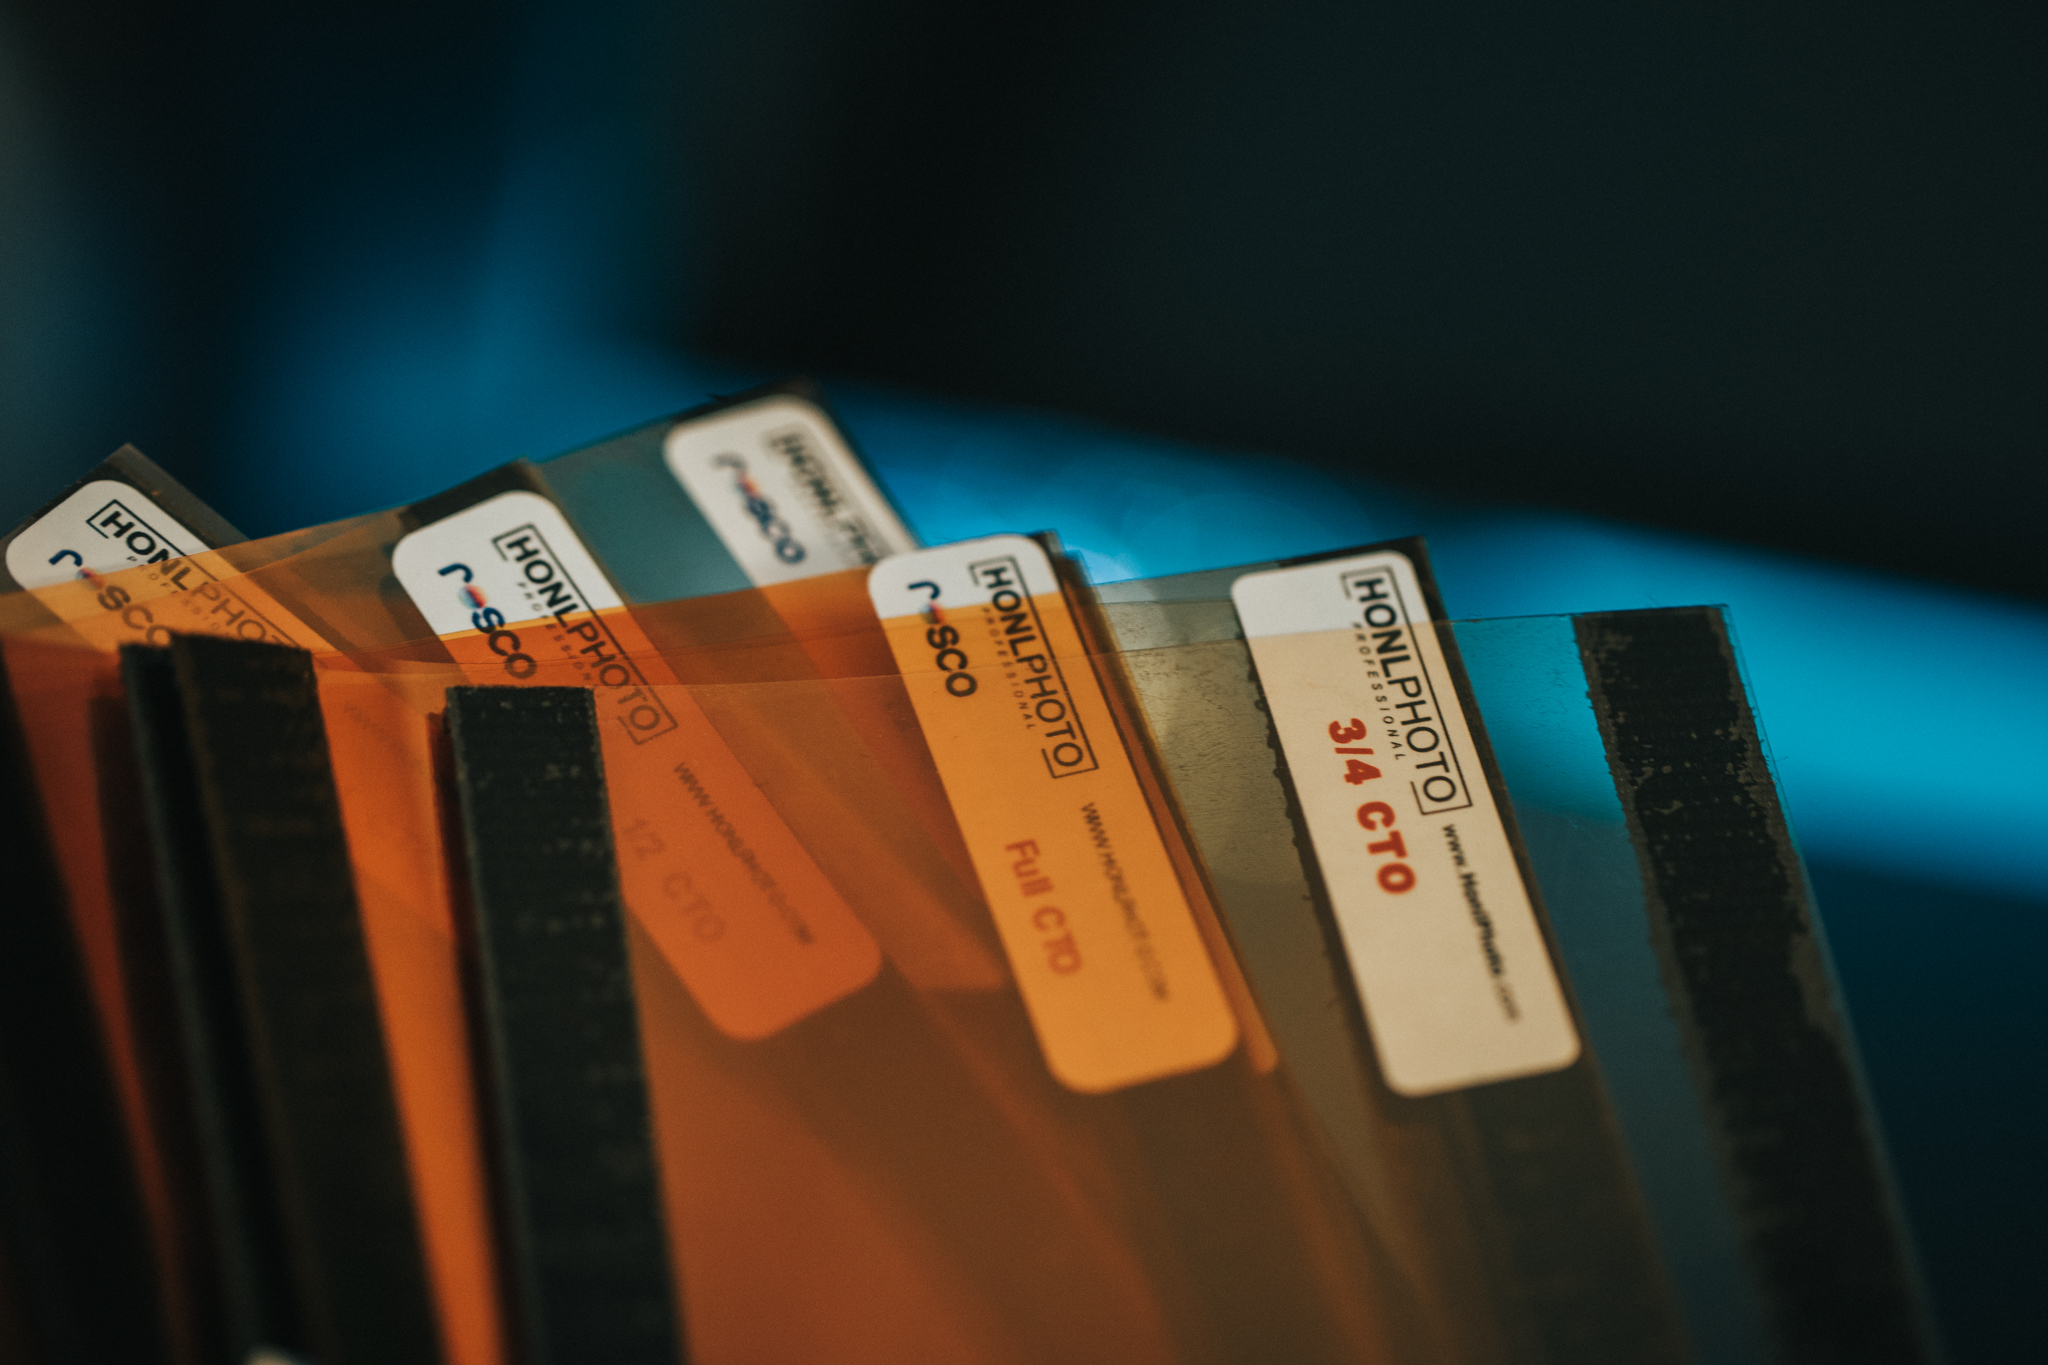
CTO filters for adding warmth to your flash.
Colours and clarity
In most of these examples you will see that I have over the years photographed my daughter in various lighting conditions, some with natural light and others using off camera flash. The biggest difference I see is in the ambient exposure, which when using natural light is always just a consequence of me correctly exposing for my subject (therefore it is typically very bright/overexposed). There also seems to be an inherent sharpness or clarity to the images that use off camera flash, the colours are also a lot more vibrant. When I shoot using natural light I often have to lift the shadows, because of exposing for the highlights on my subjects hair or face. When you start to lift the exposure, the colours start to get washed out. Bluebells become a pastelly blue, whereas using flash you get a rich bluey-purple colour. It really does make a massive difference.
Portrait shot using natural light and a reflector. The poppies are less saturated as the exposure has been lifted.
Adding flash has kept the background correctly exposed, producing greater saturation
Having an assistant
Having someone to help you is almost a necessity. A softbox on a slightly windy day is like a square kite ready to part you with your gear. To remain nimble, I like to put my flash and softbox on a monopod-type light stand, so that my assistant (usually my wife!) can move it easily. If they are familiar with the flash they can also dial the power of the flash up and down (although most modern flashes let you control that from the camera/trigger.
Now, there are many topics that I didn’t cover here, as I wanted it to be an introduction - to get people trying flash. There are many other types of lights that you can use such as, constant lighting & LED’s, there are numerous light modifiers that are on the market. Start experimenting with flash, get some Yongnuo flashes from ebay and start creating your own light!
Thanks for reading.
Ben